Heists are a late-game activity you’ll only unlock once your criminal empire is impressively rich. At the higher Empire Levels, you’ll gain access to classic Saints Row stores like Planet Saints and Let’s Pretend. Let’s Pretend is the venture you need to construct to begin heists — the costume store provides your team of professional criminals with masks to hide their identities.
You’ll be knocking over mansions, stores, and banks to train your team and increase your hourly income. Heists can be one of the trickier activities because you have to pre-plan every job. You’ll have to take 3-5 pictures at each location to identify the best possible plan. We’ll show where each picture is located.
More Saints Row (2022) guides:
5 Hilariously Weird Unlockables To Get First | 10 Little Details, Controls & Interactions | All Easter Eggs Guide | How To Make Money Early | All Secret Vehicles & Lost Wheel Collectible Locations | Best Car & Helicopter Locations | Gold Garbage Truck Location | Gargantua Monster Truck Location | How To Get A Tank | All Hidden History Locations | Game-Breaking Bug Fix | All Shooting Gallery Locations | All Fast Travel Landmark Locations | How To Complete Car Challenges | Secret Ending Guide
All Collectibles | Part 1 | Part 2 | Part 3
All Discovery Locations | 100% Completion Map
All Heists Planning Guide | Photo Locations
Heists are unlocked after purchasing the Let’s Pretend Venture for $1,600,000. This store / venture becomes available at Empire Level 4. You can purchase costumes or complete heists — heists appear on your map. To complete each heist, you must case out the heist location and take photos. After the pre-planning phase, you’ll switch to the heist phase, where you’ll backup a team of masked robbers. You play as the getaway driver, so you’ll defend the area from incoming enemies and drive the team to safety.
The trickiest part is finding all the objects you need to photograph with your camera. You need to take five pics during the pre-planning phase, with a large area to explore and no clues explaining what exactly you need to snapshot. Check below for a gallery showing what you need to find and a quick description of each photo opportunity.
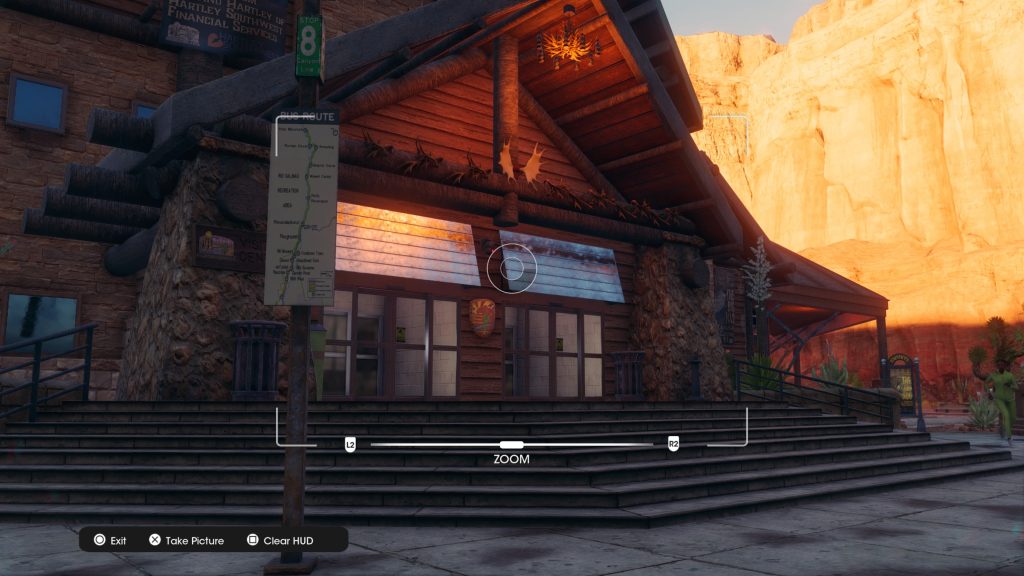
Heist #1: Kavanaugh County Park Service | Rojas Desert North


- Photo #1: Front entrance.
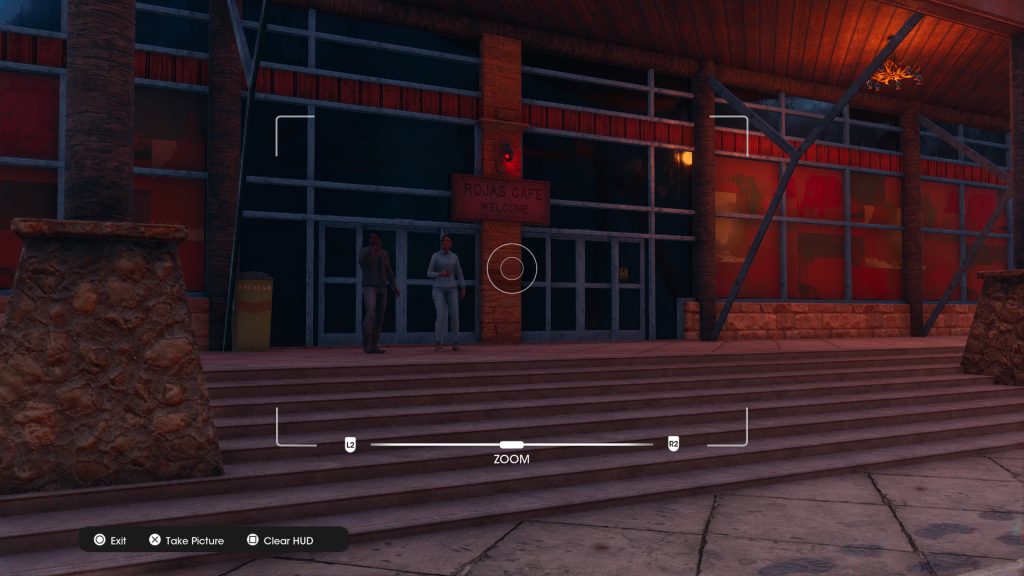
- Photo #2: Cafe entrance.
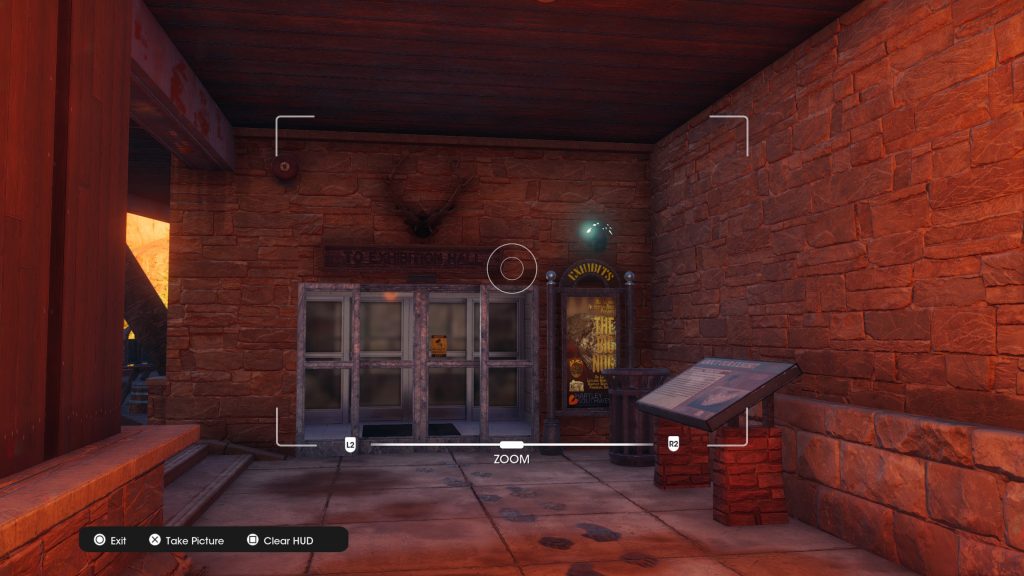
- Photo #3: Back door (working camera).
- Photo #4: Back door (broken camera).
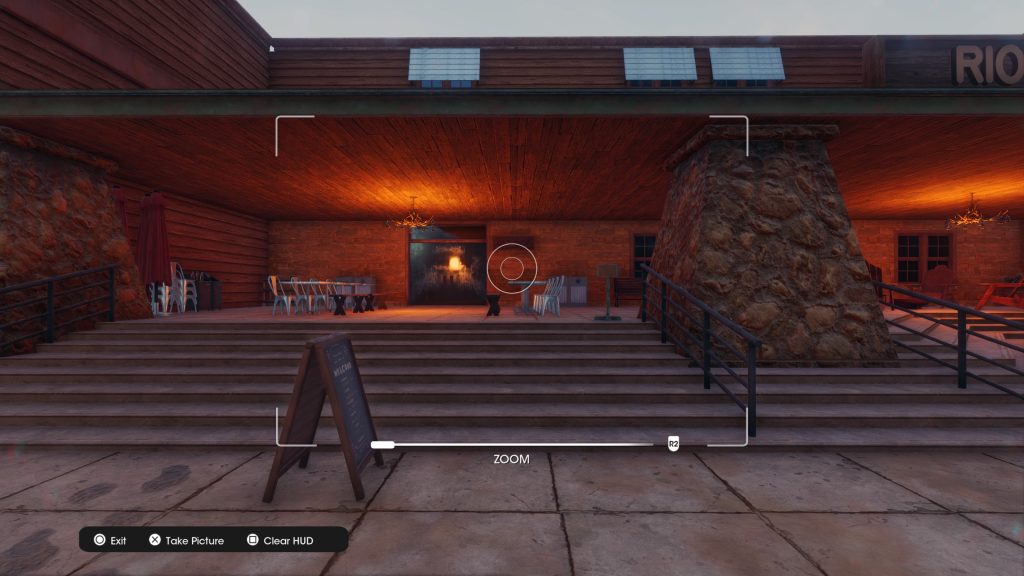
- Photo #5: Gift shop entrance.
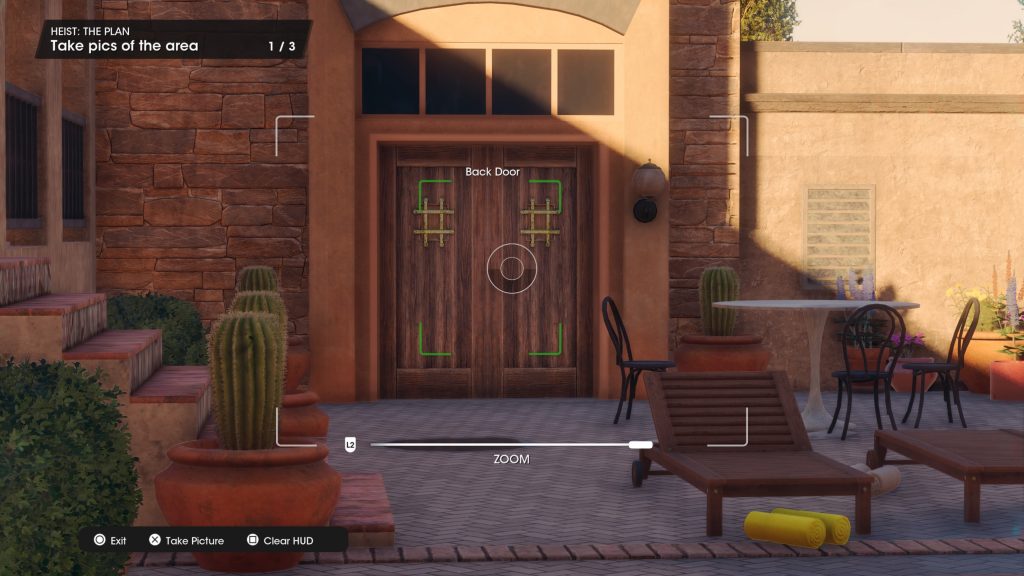
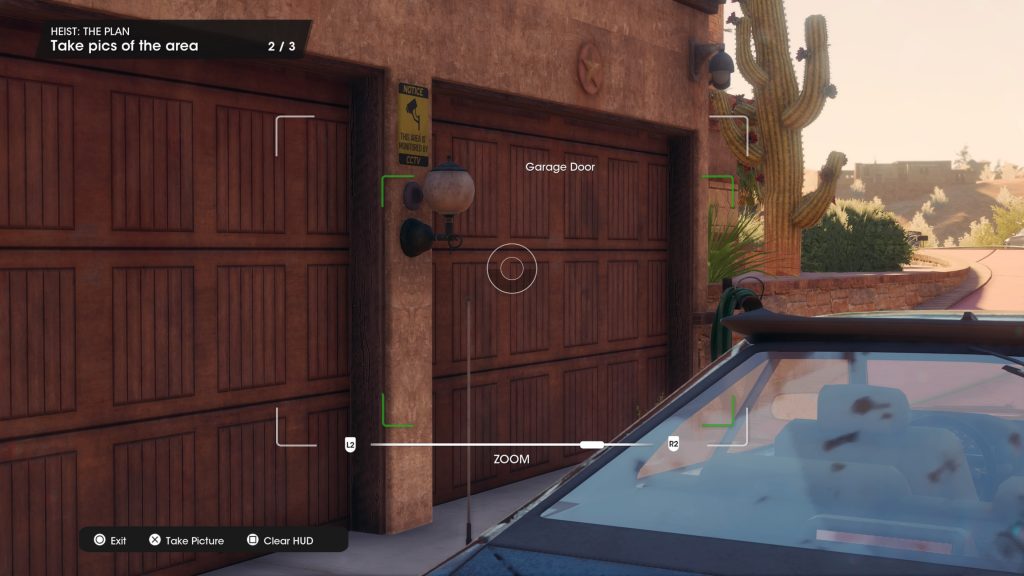
Heist #2: Mansion | Marina East
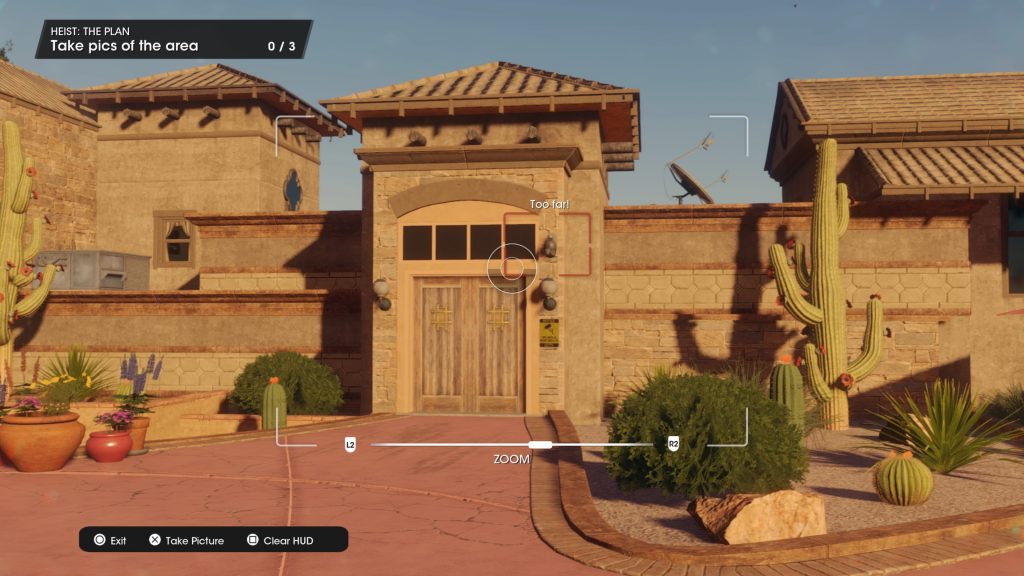
- Photo #1: Front door (camera).
- Photo #2: Back door near pool.
- Photo #3: Garage door.
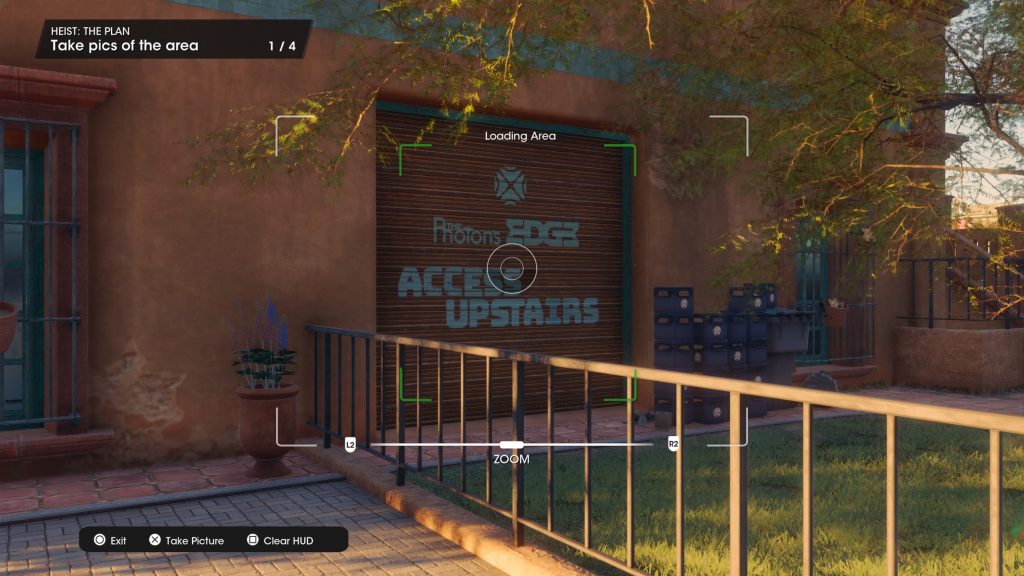
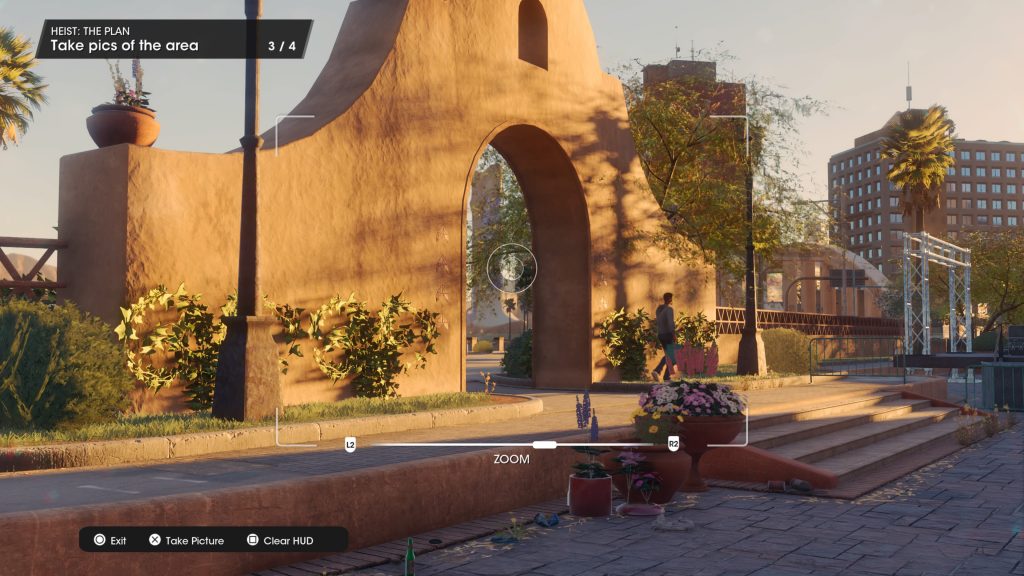
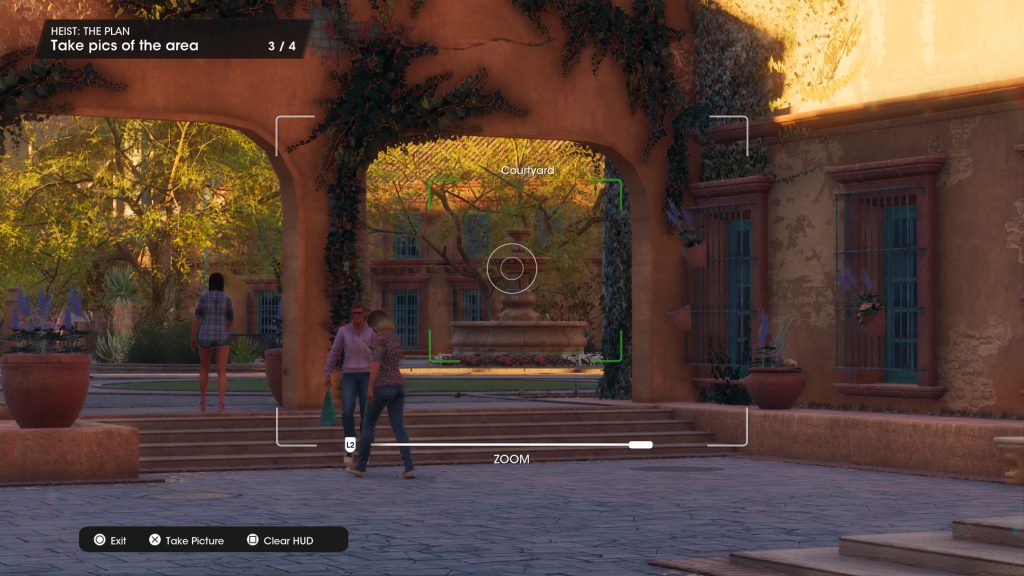
Heist #3: Store | Marina West
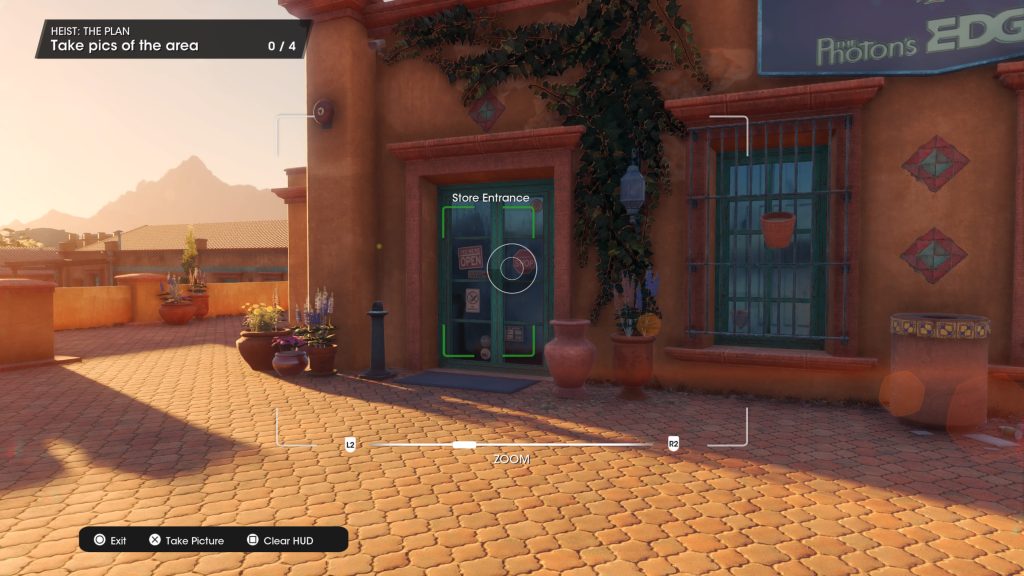
- Photo #1: Store entrance.
- Photo #2: Loading area. Garage door below the entrance.
- Photo #3: Street access. The large stucco gate outside the parking lot.
- Photo #4: Courtyard. Behind the store.
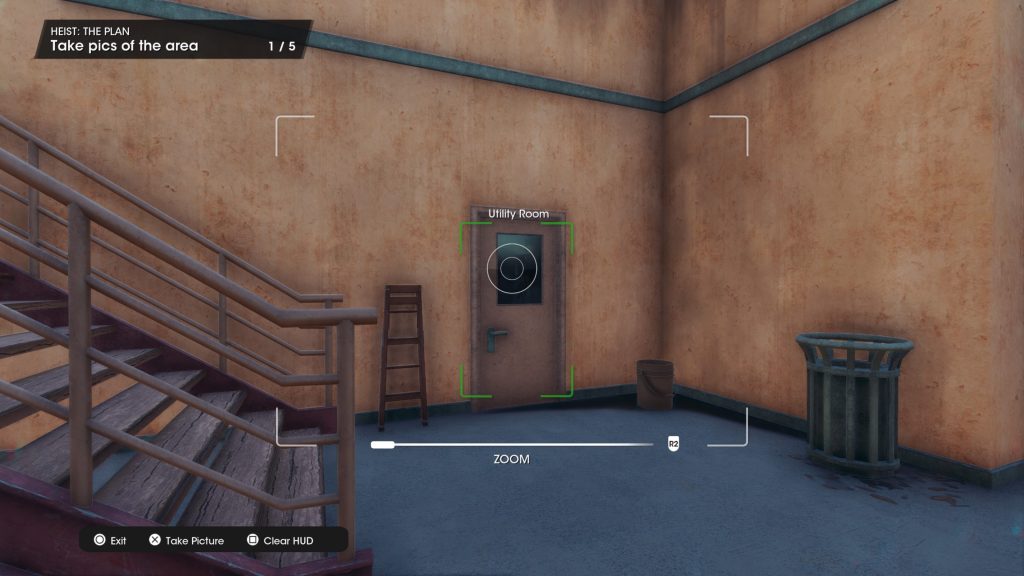
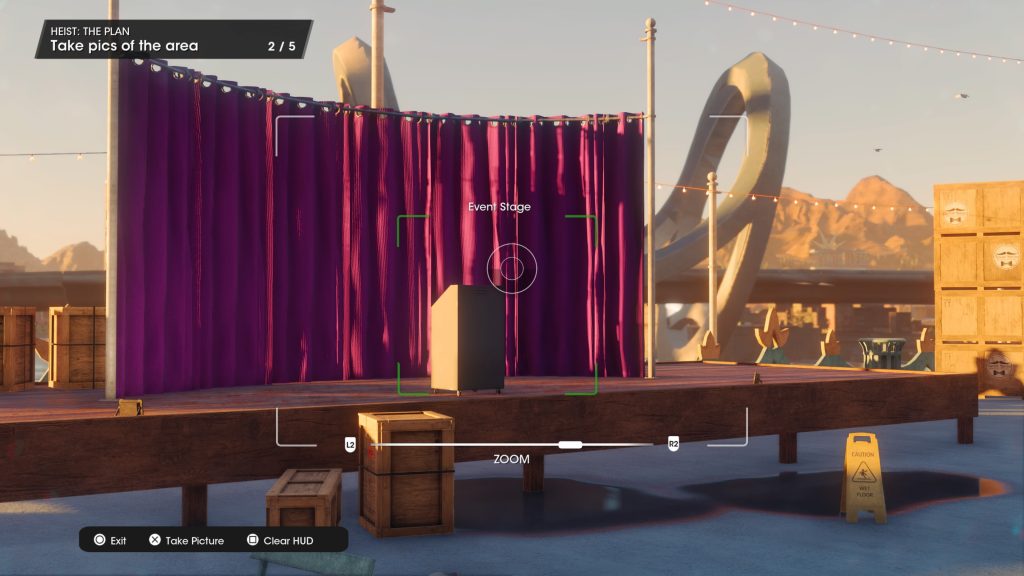
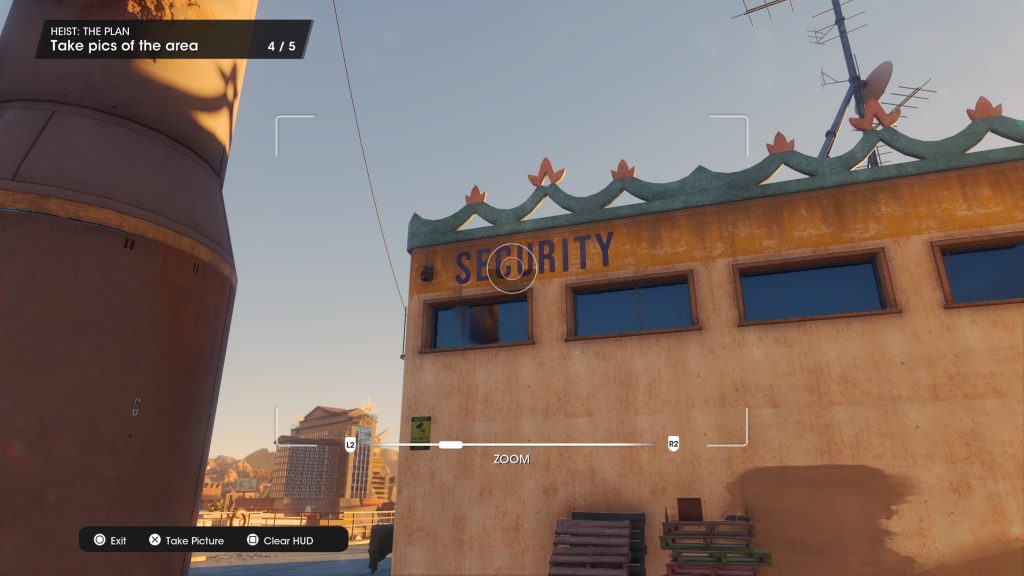
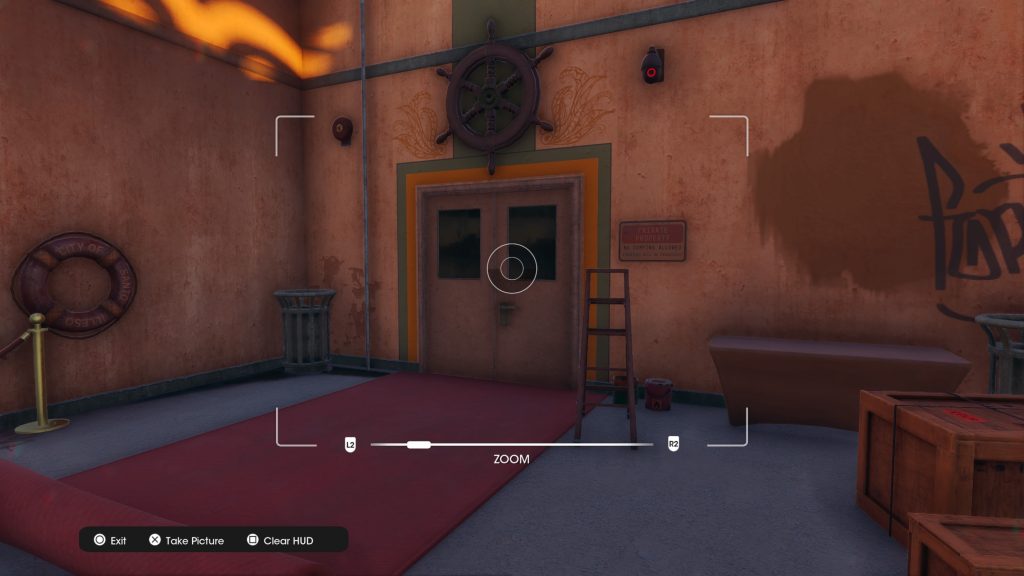
Heist #4: Riverboat Casino | El Dorado
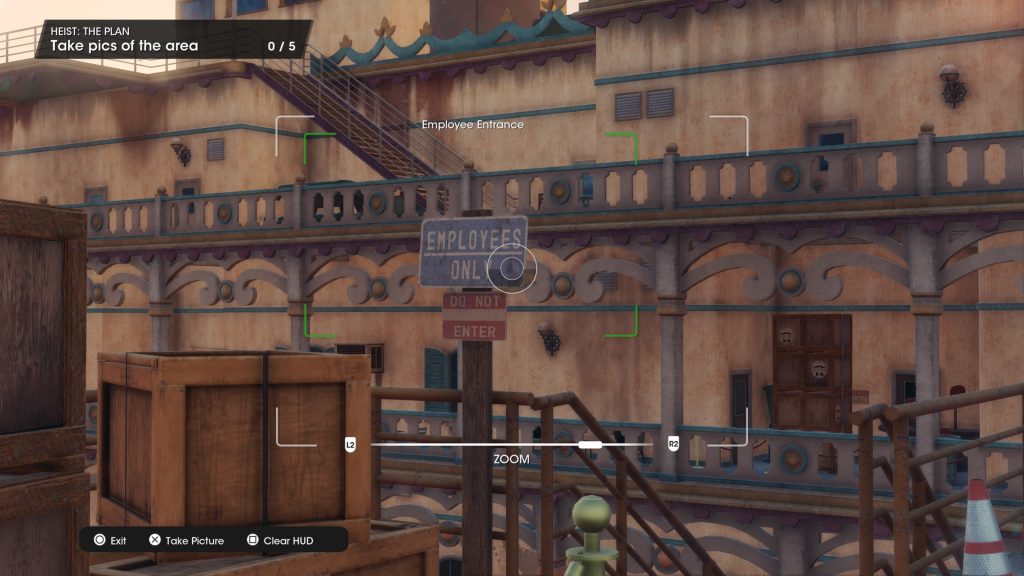
- Photo #1: Employee Entrance. The employee sign to the left on the dock leading to the riverboat.
- Photo #2: Utility Room. On the third deck, near the stairs leading to the top deck.
- Photo #3: Event Stage. Found on the top deck. Take a photo of the stage.
- Photo #4: Security Office. On the top deck. Photo the big “SECURITY” sign with the red blinking camera.
- Photo #5: Ballroom Entrance. On the bottom deck. At the front of the ship, go down and check the right side.
Heist #5: Bank | Lakeshore North
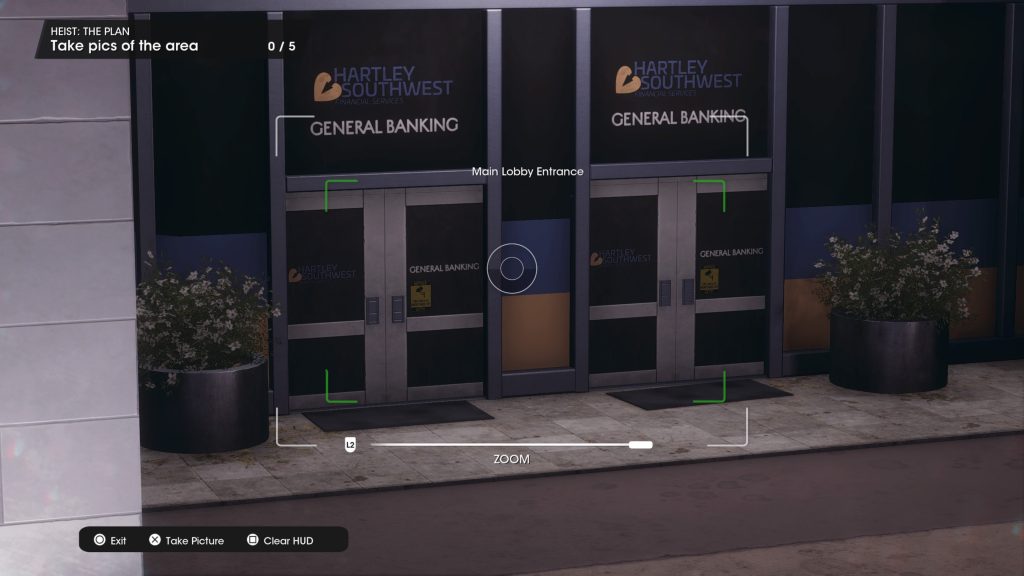
- Photo #1: Main Lobby Entrance. Front doors.
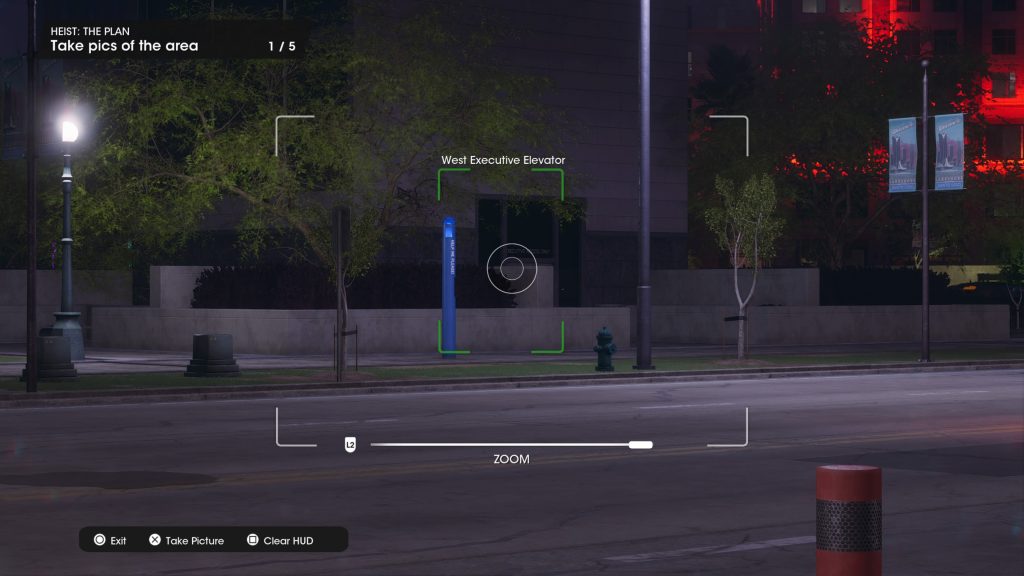
- Photo #2: West Executive Elevator. A small elevator with a red blinking light. Across the street from the main entrance.
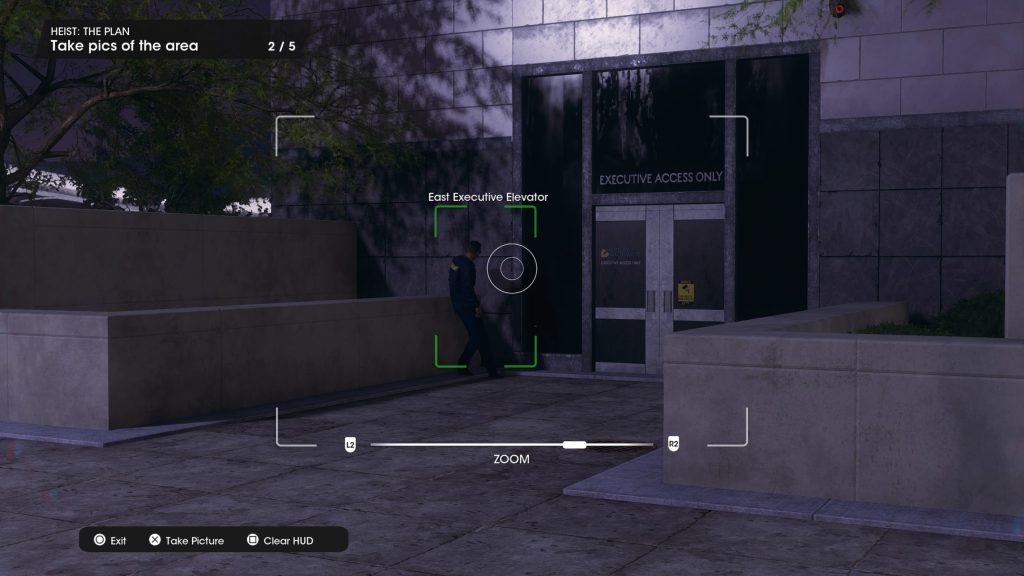
- Photo #3: East Executive Elevator. The opposite elevator with a sentry standing guard.
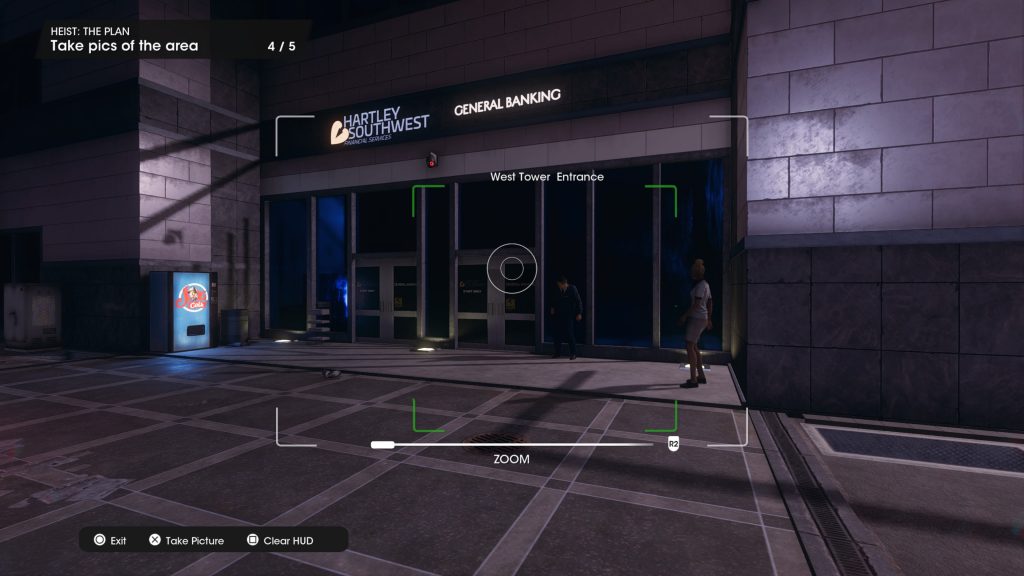
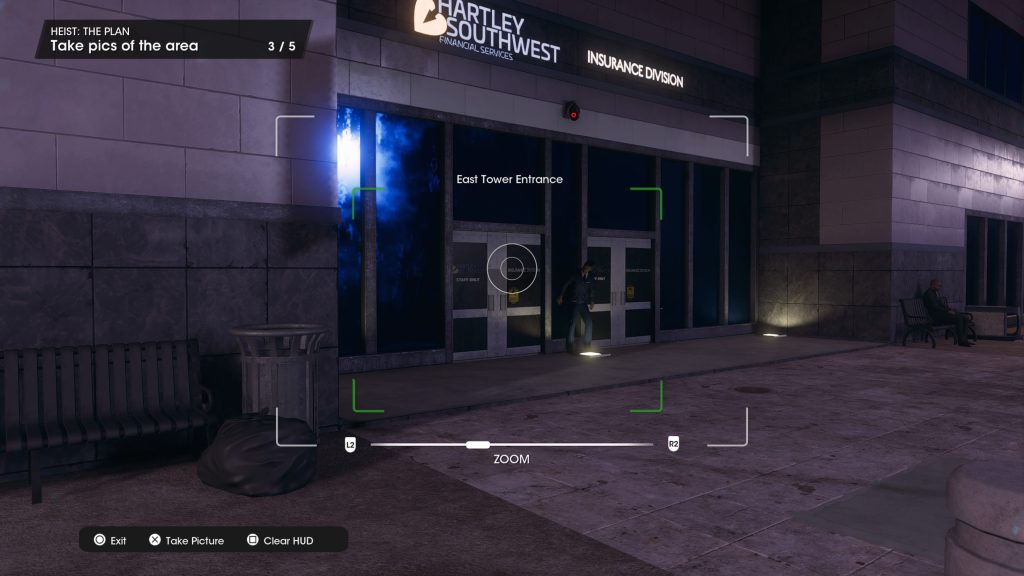
- Photo #4: East Tower Entrance. Located to the right of the main entrance.
- Photo #5: West Tower Entrance. Same as the previous one, just on the opposite side.
The last heist unlocks after completing the first four. Once the first four are complete, the bank heist will become available in Lakeshore North. The massive bank / skyscraper is your final target. Finish that and you’ll be able to return to Let’s Pretend to finish the venture.