
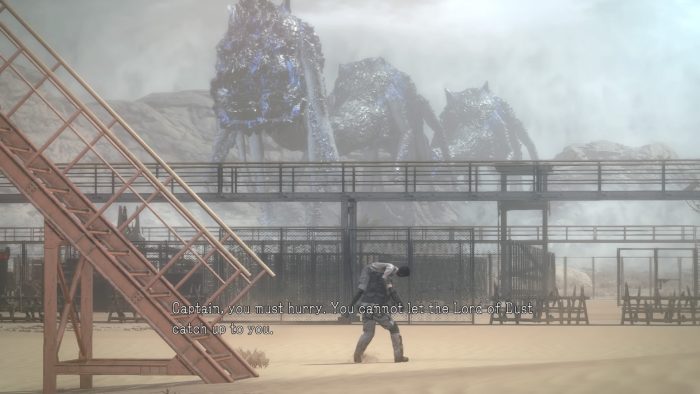
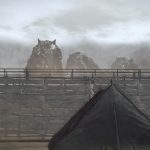
It’s time for the Captain and their cohort to escape Dite in Metal Gear Survive. Of course, nothing really goes as planned — a small army of Wanderers will attack your base, and the Lord of Dust itself will appear. The massive, horrid monstrosity is unlike anything you’ve faced before, and there’s no way to defeat it with your measly weapons.
Those regulars Wanderers, though? Those you can defeat, and in droves thanks to the turrets. Place at least three turrets (or just build two and carry them in your inventory) before starting the digger defense mission. We’ll also cover an extremely, extremely short chapter here. Before beginning the defense mission, you’ll need to expand Base Camp, upgrading the build area and giving you some extra space to build defenses. We won’t stick around for much longer, so no reason to build too much.
More Metal Gear Survive walkthroughs on Gameranx:
- Metal Gear Survive Walkthrough | Tutorial – First Steps Into Dite
- Metal Gear Survive Walkthrough | Chapter 1 – Hunger & Thirst
- Metal Gear Survive Walkthrough | Chapter 2 – First Memory Board
- Metal Gear Survive Walkthrough | Chapter 3 – Into The Dust
- Metal Gear Survive Walkthrough | Chapter 4 – The Wormhole Transporter
- Metal Gear Survive Walkthrough | Chapter 5 – Rescue The Castaway
- Metal Gear Survive Walkthrough | Chapter 6 – Exploring Ruins 01
- Metal Gear Survive Walkthrough | Chapter 7 – Secure The Digger
- Metal Gear Survive Walkthrough | Chapter 8 – Defend The Digger
- Metal Gear Survive Walkthrough | Chapter 9 – Secure The Singularity
- Metal Gear Survive Walkthrough | Chapter 10 – Rescue The Kid
- Metal Gear Survive Walkthrough | Chapter 11 – Exploring Ruins 02
- Metal Gear Survive Walkthrough | Chapter 12 – Rescue The Cop
- Metal Gear Survive Walkthrough | Chapter 13 – Secure Singularity 02
- Metal Gear Survive Walkthrough | Chapter 16 – New Map, New Memory Board
Metal Gear Survive Walkthrough | Chapter 14 & 15


Chapter 14 – Objective: Expand Base Camp from Construction menu
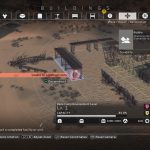
It’s finally time to go home! Well, probably – whatever the case, we can now expand the Base Camp. Before you can do it, open the Construction menu and deconstruct all the debris around your base. When that’s done, you’ll be able to expand the buildable area around your base, and truly harden your defenses for the next big defense mission. If you can’t expand, it’s because there’s still some debris blocking the expansion construction.
Chapter 15 – Objective: Start the wormhole digger
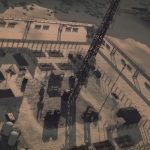
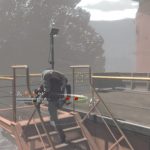
For this defense mission, I strongly recommend building an outer wall of fences around your entire base. Leave your original wall – it can now work like an inner wall, guarding your infrastructure from wanderers and bombers. You’ll also want one turret at each cardinal direction. For bonus defense, I build fence cages around the turrets – bullets don’t hurt fences, and you’ll have extra protection if wanderers try to get at you while you’re on the turret.
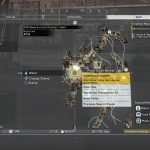
This is also a good time to construct an assault rifle and plenty of ammo. The assault rifle recipe is located in the large village (Singularity Area 02) in the obvious large container where you placed the wormhole digger to collect singularity energy. The turret recipe is located near the village – just south of Transporter 10, in the wreckage of an old convoy.
Place turrets on the south, east, and west walls. Feel free to use the guns to fend off the incoming wanderer waves – you only need to last a handful of minutes. They only attack from these three directions. You can use all the ammo you need, it will refill after the battle is over when you repair. It’s better to use the turret’s ammo instead of your own!
Gun down the Wanderers – there are lots of them, but your turrets will chew through them. There are no Bombers or other special infected, so this defense mission, if prepared, is much easier than previous missions.
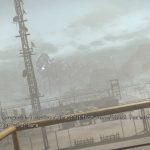
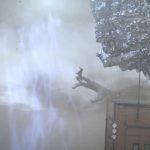
After the timer is up, you and your team will rush to Mother Base to escape via the wormhole. The energy signature from your machine signals the Lord of Dust, and the massive creature makes his first real appearance outside the Dust. When you’re in control, follow the markers up and around Mother Base, picking up Chris so you don’t leave him behind. Watch out for Crawlers and pay attention to bridges – the Lord of Dust will attempt to punch you as you cross. Don’t let that happen! Reach the top, and you’re home free… with a little assist from Virgil.
Too bad it doesn’t lead to salvation. It leads to entirely different map. Goodluck will greet you on the other side.
More Metal Gear Survive guides on Gameranx:
- Metal Gear Survive: 8 Tactical Tips To Help You Survive | Getting Started Guide
- Metal Gear Survive: Where To Find All Recipes | Locations Guide
- Metal Gear Survive: How To Get Materials & Kuban Fast | Farming Guide
- Metal Gear Survive: How To Get Clean Water & Potatoes | Hunger & Thirst Guide
- Metal Gear Survive: Trophy List


