
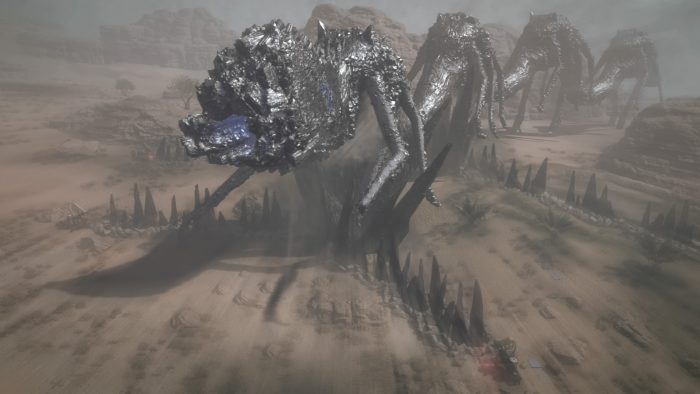
It’s been a long road, but we’re finally at the end of Metal Gear Survive. The last two chapters are all about preparing for and executing on the plan to defeat the Lord of Dust. This cyclopean creature stands head and shoulder above everything else in Dite, and defeating it won’t be easy — not when there are three waves of enemies rushing your vulnerable Archaea Blade traps.
The final battle is a long, long fight. You’ll have to survive and defeat three huge waves of zombies — and they are truly, truly huge. So huge that you’ll be supplied with pre-made defensive fortifications. The walls and turrets given to you aren’t enough to win, either. Bring lots of grenades, molotovs, mines, portable turrets, and ammo. Lots and lots of ammo.
More Metal Gear Survive walkthroughs on Gameranx:
- Metal Gear Survive Walkthrough | Tutorial – First Steps Into Dite
- Metal Gear Survive Walkthrough | Chapter 1 – Hunger & Thirst
- Metal Gear Survive Walkthrough | Chapter 2 – First Memory Board
- Metal Gear Survive Walkthrough | Chapter 3 – Into The Dust
- Metal Gear Survive Walkthrough | Chapter 4 – The Wormhole Transporter
- Metal Gear Survive Walkthrough | Chapter 5 – Rescue The Castaway
- Metal Gear Survive Walkthrough | Chapter 6 – Exploring Ruins 01
- Metal Gear Survive Walkthrough | Chapter 7 – Secure The Digger
- Metal Gear Survive Walkthrough | Chapter 8 – Defend The Digger
- Metal Gear Survive Walkthrough | Chapter 9 – Secure The Singularity
- Metal Gear Survive Walkthrough | Chapter 10 – Rescue The Kid
- Metal Gear Survive Walkthrough | Chapter 11 – Exploring Ruins 02
- Metal Gear Survive Walkthrough | Chapter 12 – Rescue The Cop
- Metal Gear Survive Walkthrough | Chapter 13 – Secure Singularity 02
- Metal Gear Survive Walkthrough | Chapter 14 & 15 – Escape Dite
- Metal Gear Survive Walkthrough | Chapter 16 – New Map, New Memory Board
- Metal Gear Survive Walkthrough | Chapter 17 – Meet The Charon Corps
- Metal Gear Survive Walkthrough | Chapter 18 – Find Sahelanthropus
- Metal Gear Survive Walkthrough | Chapter 19 – The 15 Minute Defense
Metal Gear Survive Walkthrough | Chapter 23 & 24


Chapter 23: Objective: Craft the Archaea Blade Trap
The battle to defeat the Lord of Dust is about to start. Before we can begin, you’ll need to craft the Archaea Blade Trap. The plan is simple – place the Archaea Blades in the path of the Lord of Dust, then finish it off with the EM Railgun.
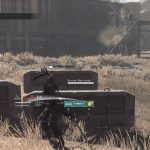
To craft the Archaea Blade Trap, access the special tab in the Construction Menu. The trickiest item to find for the Archaea Blade Trap are the Sensor Units. To get enough Kuban Energy, complete singularity side-quests or raid high Kuban concentration areas.
NOTE: To get four Sensor Units, raid one of the rooms in Transporter 07. There’s a room with four Sensor Units – everything you need. If you’ve already taken them, just wait awhile. Go do some other quests. Items will only respawn after a certain amount of in-game time has passed.
Chapter 24 – Objective: Start the wormhole digger
Let’s get prepared for any contingency – make sure you have turrets placed in the South / West / East directions of your base, and carry two turrets in your inventory. Finally, build and carry as many Assault Rifle rounds as you can. Equip a rig and customize the ammo capacity to carry more. The more bullets you have, the easier the final battle will be. You can also craft extra bullets and place them in your Base Camp inventory – simply return to the inventory case and press [R3] to restock instantly.
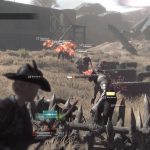
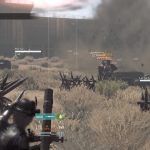
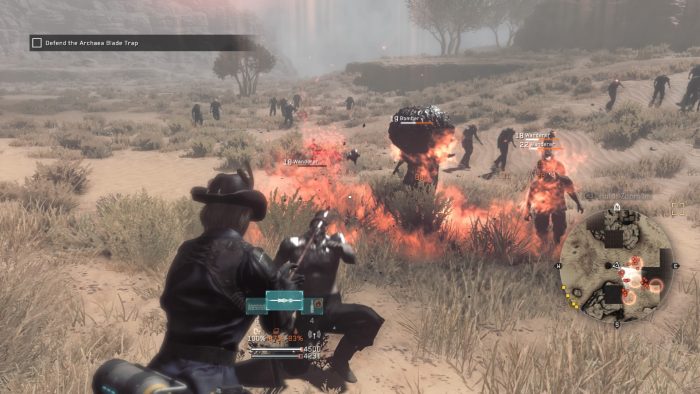
When you’re prepared, it’s time to use the wormhole digger in your Base Camp and begin the final battle against the Lord of Dust. You’ll also have to deal with a steady army of incoming Wanderers, so be prepared with grenades, mines, traps, molotovs, and repaired melee weapons.
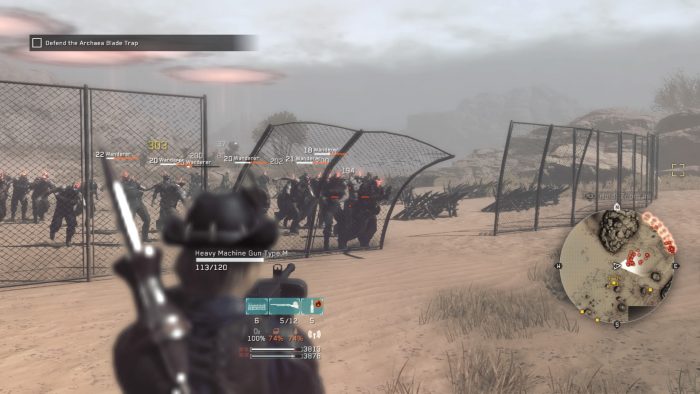
Before you can damage the Lord of Dust, you’ll have to defend against three waves of Wanderers. At each wave, you’ll get a wall of defenses you can use to stop the incoming enemies – including machine gun turrets and mortars. These will disappear when you defeat the wave, so go ahead and use them up. Try to defend the walls as much as you can – use molotovs to burn enemies as they reach the walls, grenades to wipe out groups, and the machine guns against special zombies like Bombers and Mortars.
NOTE: You’ll have time between waves to return to Base Camp and resupply or repair. Use it to craft more grenades, molotovs, bullets, and whatever other items you need. It helps to repair your spear or other melee weapon, too.
1st / 2nd Wave: Only Bombers will appear (alongside normal Wanderers) in the first wave. In the second wave, you’ll have mortars and fire traps to help. Try to take out the Bombers before they destroy the fire traps – and don’t use the machine gun turret near the archaea trap until the end of the wave, when three Mortars appear on the high ledge. Unload on them with the machine gun to finish the wave off.
3rd Wave: During the third wave, you’ll have an array of machine guns to use. Don’t ignore those – use them all up to fight back the hordes of Wanderers. They attack in huge numbers during this wave, so bring plenty of grenades, mines, and molotovs. Bring a Shotgun or Assault Rifle to fight the Trackers that spawn in and leap directly toward your objective.
After a huge wave of Trackers appears – which can be taken care of with a shotgun or revolver – you’ll need to prepare for a final, huge push. It’s very likely you’ll be out of machine gun turret ammo at this point. Begin placing your own turrets, set lots of mines in a staggered path ahead of the horde, and use molotovs / grenades. Use everything you’ve got, and you’ll finally complete this insane defense.
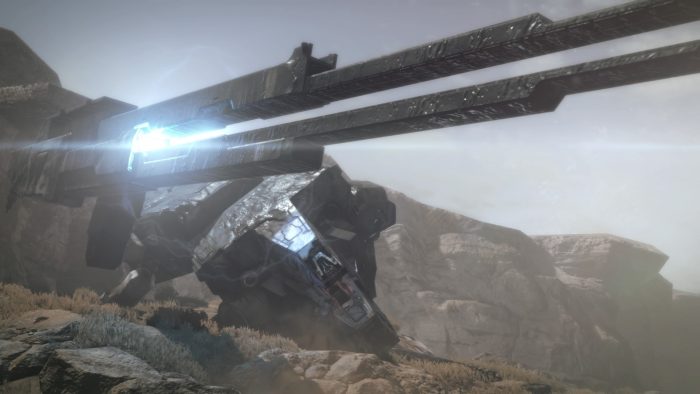
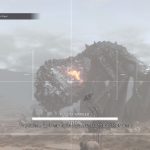
Objective: Shoot the Lord of Dust with the railgun
Sprint to the railgun to aim at the monster – target the large glowing spot connecting the first and second sections of the body – when the moving crosshair floats over your reticule, the reticule will turn orange. That’s when you can fire. Pull the trigger on the weak point only when the reticule is orange to blast the monster.
But, it wasn’t enough. The Dread Dust can’t die – not unless something merges with it that knows how to die. Unfortunately, that’s going to be Virgil. The double-personality AI flies into the Lord of Dust, and it’s up to you to sacrifice your support. Aim for the glowing spot on the head, and fire a second time from the EM Railgun to end the Lord of Dust once and for all.
Congratulations! The world is saved. The mission is over. You’ve completed Metal Gear Survive. There’s still more to do – lots more to do, if you’re up for it. But that’s it for our walkthrough. Virgil might’ve survived the ordeal, but we barely made it through the game with our sanity.
More Metal Gear Survive guides on Gameranx:
- Metal Gear Survive: 8 Tactical Tips To Help You Survive | Getting Started Guide
- Metal Gear Survive: Where To Find All Recipes | Locations Guide
- Metal Gear Survive: How To Get Materials & Kuban Fast | Farming Guide
- Metal Gear Survive: How To Get Clean Water & Potatoes | Hunger & Thirst Guide
- Metal Gear Survive: Trophy List


