
Table of Contents – Wasteland Shrines
- Daqo Chisay Shrine
- Hawa Koth Shrine
- Kay Noh Shrine
- Jee Noh Shrine
- Tho Kayu Shrine
- Suma Sahma Shrine
- Kema Zoos Shrine
- Dila Maag Shrine
- Misae Suma Shrine
- Raqa Zunzo Shrine
- Korsh O’hu Shrine
Dako Tah Shrine – Electric Path
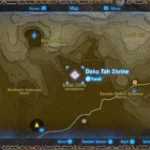
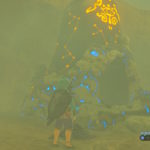

The thick sandstorms in the Great Cliffs makes this shrine difficult to locate. If you want to have an easier time, view the cliffs area from Birida Lookout. From afar, the sandstorm won’t appear, allowing you to mark the shrine. Within the storm, your map won’t work — the easiest way is to paraglide in from above.
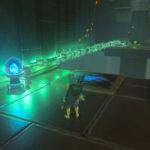
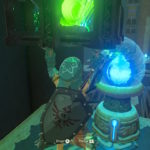
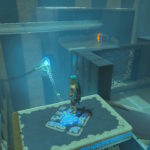
Inside, follow the path (and destroy the Scout Guardian) to reach a platform. Ride across and grab the generator with Magnesis — press [Up] to move the generator close to the crystal that powers the platform to get all the way across.
Pick up the generator and step onto the raised elevator platform. When you stand near the elevator crystal, it will activate.
- Optional Chest: Stop the elevator mid-way up to find this tricky chest.
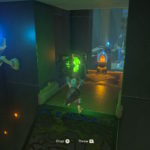
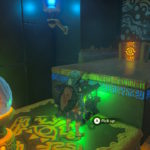
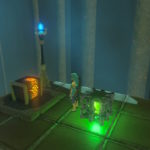
In the next room, there are two Scout Guardians on a metal floor. Toss the generator onto the floor to electrify it and kill both Guardians at once. Pretty nifty!
- Optional Chest: There’s another optional chest in the room with the two Scout Guardians. Don’t miss it! It’s right next to the ladder.
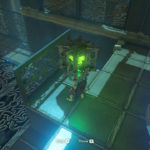
Use Magnesis to push back the metal block in the back-right corner. Take the ramp down and hit the switch to reactivate two lifts — one below and one above.
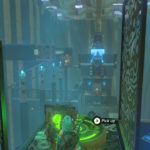
- Optional Chest: Yet another chest! This one is available if you ride the left next to the switch. Ride down two floors to find this hidden chest.
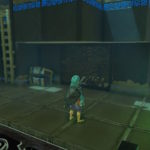
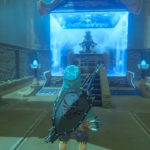
Place the generator on the pad after riding the upper lift to the top floor. This activates a platform that will (eventually) lead you to the altar. While riding the lift, use Magnesis to push the metal block all the way back.
- Optional Chest: Yes, there’s another chest. This one is in the corner where you push the metal block to the altar. When you reach the altar, push the metal block back towards its original spot to find this chest alcove.


