• Skip to main content
  • Skip to header right navigation
  • Skip to site footer
Gameranx

Gameranx

Video Game News, Lists & Guides

  • News
  • Features
  • Platforms
    • Xbox Series X
    • PS5
    • Nintendo
  • Videos
  • Upcoming Games
  • Guides

Breath of the Wild – How To Solve All Shrines | Hateno Walkthrough

March 9, 2017 by Kevin Thielenhaus

On WiiU & Switch: Learn how to reveal hidden Shrines, how to solve difficult puzzles, and tips for completing two battles in extreme conditions.


Table of Contents – Hateno Shrines

  • Mezza Lo Shrine
  • Kam Urog Shrine
  • Dow Na’eh Shrine
  • Myahm Agana Shrine
  • Tahno O’ah
  • Jitan Sa’mi

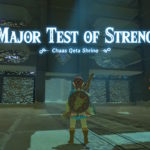
Chaas Qeta Shrine – A Major Test of Strength


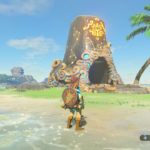
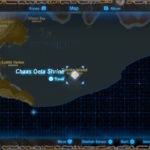
This shrine is far out in the Necluda Sea, on a tiny island that’s easily visible for Hateno Village. Find a tiny wind boat around Hateno Bay (or Deepback Bay) and use a leaf to generate wind, allowing you to steer the boat toward Tenoko Island.

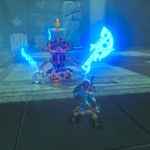
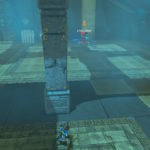
Bring some powerful weapons, because this isn’t a puzzle. Instead, you’ll face a Scout Guardian with 3000 HP. Wait until the Guardian jumps away and prepares a spin-attack. When it comes charging wildly, all weapons spinning, hide behind a pillar. When it crashes into the pillar, it will be stunned, giving you time to attack.

This dangerous opponent can kill in a single strike, and most weapons will barely touch it. It doesn’t hurt to wait until you’ve acquired the Master Sword to complete this battle.

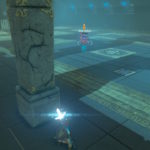
To safely deal with the Scout, use ice-weapons to freeze then attack with your strongest weapon. A combo, or charged combo, will help — and breaking ice deals triple normal damage. If it uses a spinning blue laser, use the wind to paraglide over it and unleash a jump-attack.

Save pillars for the near-end of the battle. The Guardian will charge a series of explosive beams. When the beams are charged, run in a circle to avoid. Attack when it’s charging and back off when it’s about to unleash a barrage.

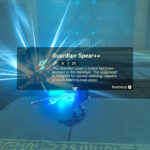
When the Guardian is finally down, you’ll be able to collect its weapons and access the altar.

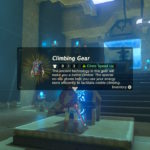
  • Optional Chest: The chest before the altar contains the Climbing Gear shirt, which gives Link an additional climbing speed boost.

Pages: Page 1 Page 2 Page 3 Page 4 Page 5 Page 6 Page 7 Page 8

Share this post:

FacebookTwitterLinkedInPinterest

Recent Videos

Subnautica 2 - Before You Buy

Subnautica 2 - Before You Buy

20 Legendary Games That PUSHED GRAPHICS TO THE LIMIT

20 Legendary Games That PUSHED GRAPHICS TO THE LIMIT

10 Games That Died FAST

10 Games That Died FAST

Directive 8020 - Before You Buy

Directive 8020 - Before You Buy

Are AA Games Catching Up AAA Games?

Are AA Games Catching Up AAA Games?

10 Recent Games That PROVED EVERYONE WRONG

10 Recent Games That PROVED EVERYONE WRONG

The GREATEST Final Bosses Ever Designed

The GREATEST Final Bosses Ever Designed

GTA 6 MOST EXPENSIVE GAME EVER? & MORE

GTA 6 MOST EXPENSIVE GAME EVER? & MORE

Mixtape - Before You Buy

Mixtape - Before You Buy

Category: UpdatesTag: Guides, Legend of Zelda: Breath of the Wild, Nintendo Switch, WiiU

Sidebar

Recent Posts

  • Overwatch Is Officially Answering The Call In Fortnite
  • Rumor: A Nintendo Direct May Have Been Uploaded To YouTube
  • Amazon Has Quietly Confirmed They Cancelled Their The Lord of The Rings MMO
  • Nintendo Switch Online Expansion Pack Gets Updated With Five Virtual Boy Games, Including Tetris
  • Rumor: GTA 6 Pre-Orders Begin May 18 On Best Buy

Copyright © 2026 · Gameranx · All Rights Reserved · Powered by Mai Theme