
[Get more daily gaming guides. Subscribe to GuideRanx on YouTube!]
As a blob of mysterious goo, fighting through an ever-changing island filled with monsters and giant bosses, you really don’t stand much of a chance in the early hours of Dead Cells — a new ‘metroidvania’ rogue-lite that’s all about tightly navigating randomly-generated dungeons. Actually earning your first victory is a real challenge, and because I’ve just finished my first cycle, I’m here to share some of my insights.
Let’s get this out of the way — Dead Cells is hard, but it isn’t too hard. Compared to the likes of Spelunky or even early Enter the Gungeon, this game is a breeze, even if it takes 40+ minutes to complete a single run. Your weapons are strong, and things only get really difficult in High Peak Castle, the last biome. That’s when you’re bound to start hitting real resistance. The last boss can be a doozy, too. But, if you bring the right built, and make the right choices, you’ll crush the Hand of the King. Here are my 10 tips.
More Dead Cells guides on Gameranx:
- Dead Cells: How To Find Keys & Cash In The Promenade | Secrets Guide
- Dead Cells: How To Get The Vine, Teleportation, Ram & Spider Runes | Locations Guide
- Dead Cells: Want To Make Easy Progress? Equip Double Turrets | Powerful Build Guide
- Dead Cells: How To Access Every Area | Hidden & Optional Areas Guide
- Dead Cells: All Secret Key & Blueprint Locations | Gardener’s Keys, Architect’s Key & More


#1: Scour Every Biome For Treasure, Scrolls & Elite Enemies
To get stronger in Dead Cells, you’re going to need to upgrade your equipment, and level-up your skills. There are three primary skill pools — Brutality (Red), Tactics (Purple), and Survival (Green). Each weapon fits one of these skill pools, and you’ll want to get as many skill upgrades as possible.
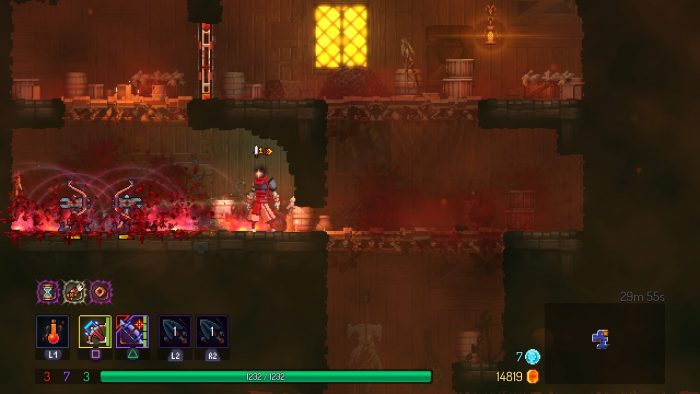
Every biome has three things you want to look out for — skill scrolls, treasure chests, and elite enemies. Elite Enemies are in rooms with giant stone runes, or they’re strange enemies covered in black gunk. Attack or enter a room, and the Elite Enemy will attack. They’re tough, but there’s a high chance they’ll drop a useful item. Search every biome carefully, and grab everything you can.
#2: More Damage Trumps Health
While hunting Skill Scrolls, you’ll find different types of scrolls — some give you the option to choose any of the three skills. Others are limited to just two. Whatever the type, you’ll want to select a primary skill and stick with it. Every time you level up a skill, that skill’s power will increase by +15%. That’s a huge boost, especially once you hit the double digits.
Leveling up skills also gives you a permanent max health upgrade. The more you level up, the less health you’ll get — but the +15% damage boost stays solid, no matter how often you level up. Essentially, you’ll always want to boost your damage over increasing health. The more damage you do, the faster you’ll kill enemies, and the less time you’ll be in danger. Equip items that match your highest skill and you’ll be killing enemies fast.
#3: Double-Up On Turrets
Turrets are my best friend. They aren’t the end-all best strategy, but they’ve been a killer combo for me. Typically, I focus on Tactics and only use purple-weapons. They’re a safe, simple weapon type that keeps you far away from danger. They’re also incredibly powerful if you get the right status effects and upgrades.
What really matters are the turrets. There are lots of different traps, but I like to keep at least one or two Double Crossb-o-matics or a Sinew Slicer. They’re easy to deploy, can block enemy attacks / projectiles, and stack status effects extremely quickly. Arguably, using turrets is the safest method to victory. You don’t even have to fight most enemies, the turrets will do all the work for you.
#4: Stack Every Status Effect
There are three status effects I focus on — bleed, poison, and burning. The Sinew Slicer will always stack bleed, while later Double Crossb-o-matics will usually involve poison or burning in some way. DPS is great, but what you really want is to stack as many status effects on your enemies as possible. The Sinew Slicer might seem far weaker than your basic sword, but once it stacks 4+ charges of bleeding, enemy health bars just melt away.
#5: Get The Ygdar Orus Li Ox For A Second Chance
From the first mutation vendor, you’ll be able to select a mysterious mutation called Ygdar Orus Li Ox — it brings you back to life with 25% health if you die. This can only be selected at the very first vendor, but it can be incredibly useful, especially for the last boss. Don’t die and waste the revive. Keep it and take it with you to the final boss. If you does get used up, you can replace the mutation with something else, but I recommend bringing it into the final boss encounter for an extra little safety net.
Find the five more tips for completing Dead Cells on the next page.


