
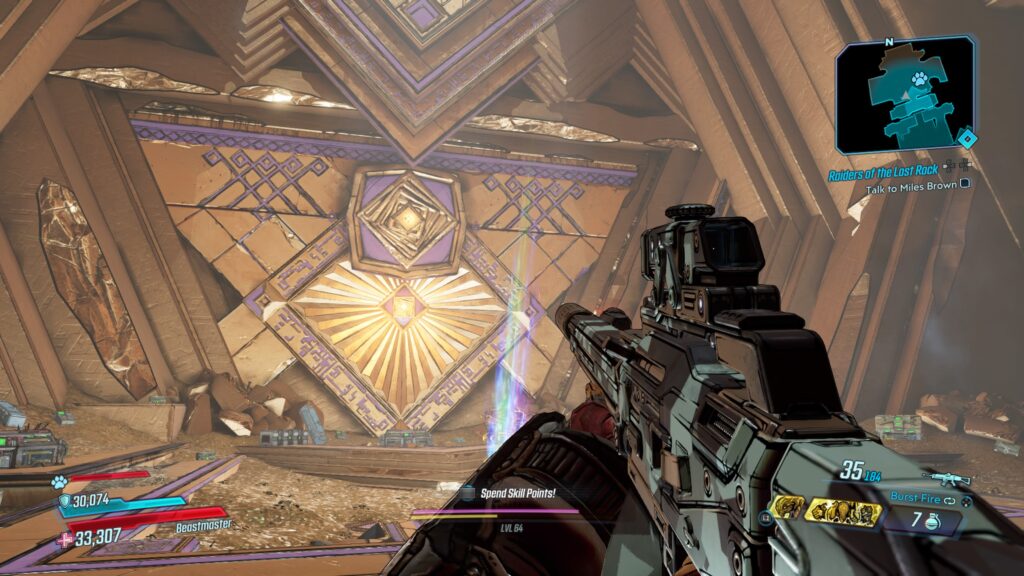
There’s not just one secret room in the super-vault at the end of the final DLC for Borderlands 3 — there are two secret rooms! And it’s practically impossible to find on your own. By shooting very specific (and well-hidden) buttons, you can unlock a bonus room in the Vaulthalla vault. That bonus room is full of treasures, and there’s an additional room with even more treasures in that room — it only sounds confusing because it is.
Finding all the yellow buttons is a huge pain in the butt. The first set is tricky, but the second set is almost impossible. There are 24 buttons in total, and if you manage to get them all and reach the hidden chamber, you’ll earn the extremely rare ‘Ye Who Enter’ achievement / trophy. It’s a fun bonus that just might net you a unique legendary gun. I found the Hellwalker Doom (2016) Easter egg shotgun on my first run!
More Borderlands 3 guides:
The Best Unique Guns & How To Find Them | Easter Eggs & Secrets Guide | All SHiFT Codes List | How To Get Golden Keys | Vault Insider Program Codes List | VIP Guide
To reach the secret room and unlock the ‘Ye Who Enter’ achievement / trophy, you’ll need access to Vaulthalla. This is the area before the boss arena / treasure room. There are multiple yellow buttons you need to shoot.
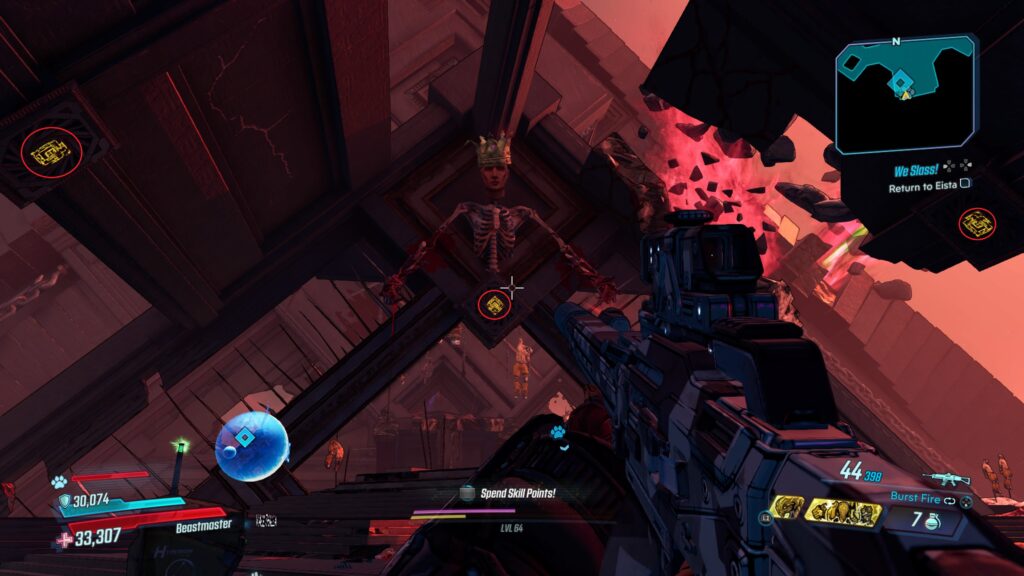
Right at the start, shoot the three yellow buttons on the ceiling. There is one under the crown-wearing skeleton, and one to the left and one to the right.
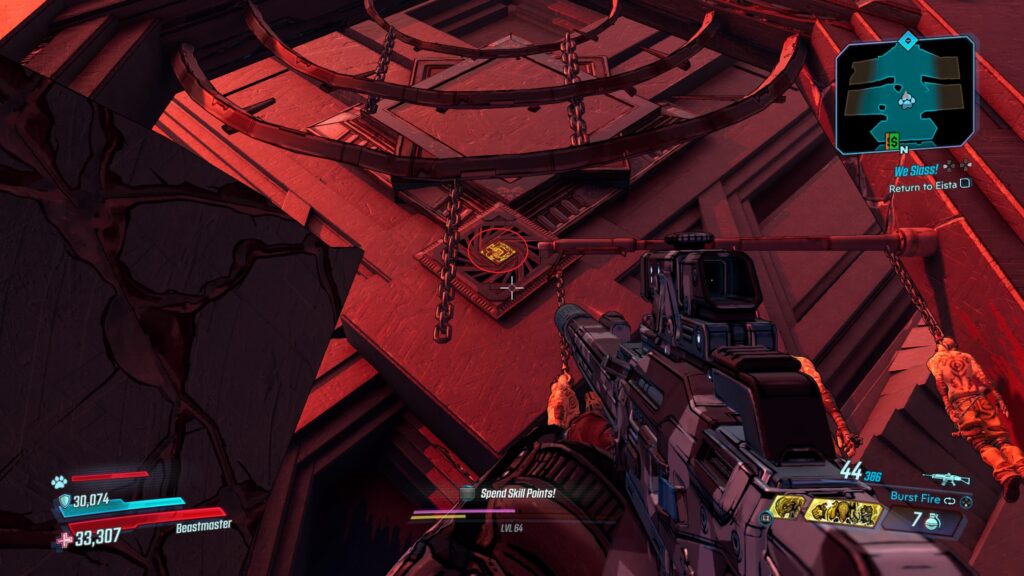
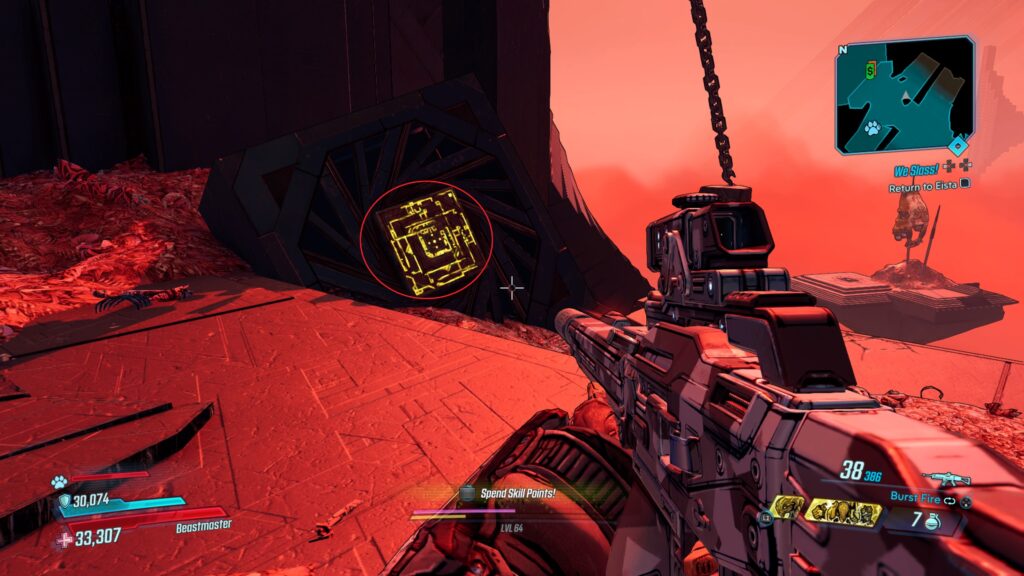
There are three more yellow buttons to shoot before entering the boss arena. Enter the Lesionhall and approach the boss door with the giant mask. Turn around and look at the wall above / opposite to see the first button. Another is right under the mask, and the third is in the rubble to the right of the main path.
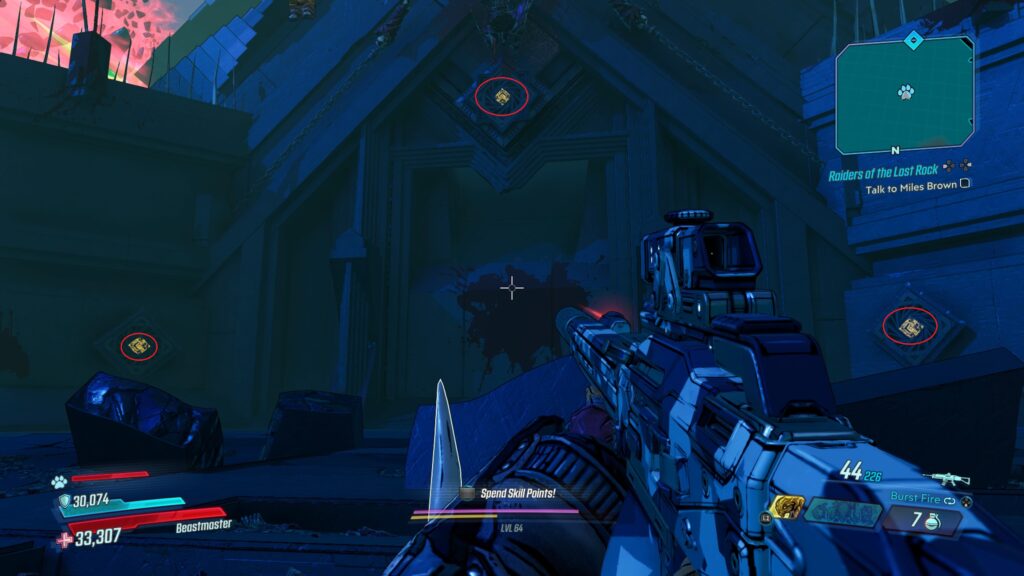
Defeat the boss in the arena and then turn around to face the entrance. You’ll easily spot these three yellow buttons on the back wall. We’ve hit nine buttons so far — there are three more to go to unlock the sealed room.

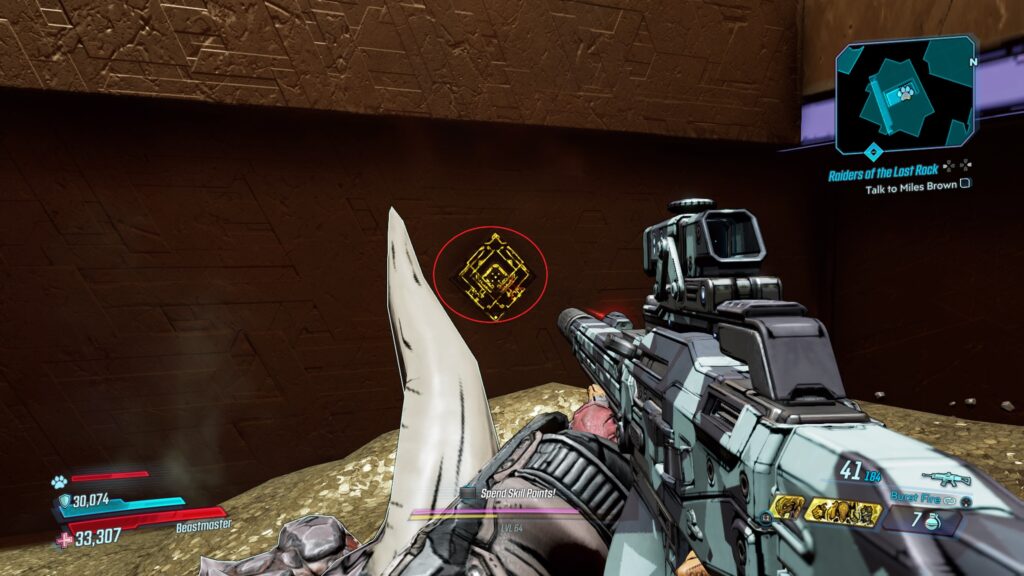

Defeat the boss and enter the timed vault. You have a limited amount of time, so you need to shoot the next three yellow buttons quickly — the first is under the exit door. Use a ground slam to smash the floor straight under the exit doorway to find a secret room with this button. Another is on the ground on the left side of the room — it’s on the second left platform. The last is on the wall opposite the secret room.
- NOTE: The secret room is in the far back of the limited-time treasure vault. Use the left-hand jump-pads to climb up to the top and reach it.
Shoot all 12 yellow buttons and the secret room will unlock! Once you’re inside, there are more secret buttons to shoot — but you’ll have unlimited time to find them. The timer will stop in this secret room.
There are 12 more buttons you need to shoot to unlock the super-secret hidden room.
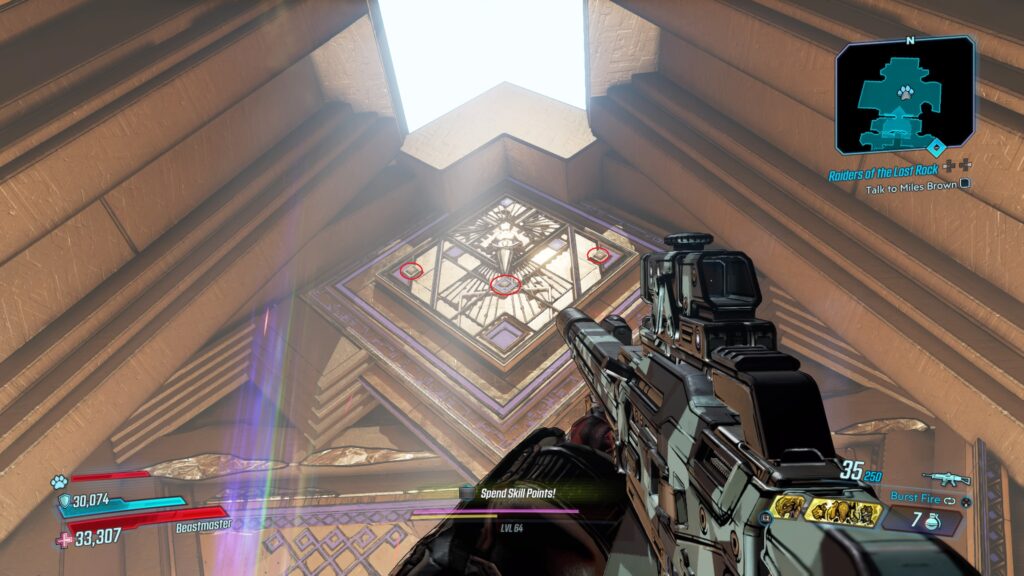
- Button #1: Right above on the back of the room on the diamond-shaped seal. One is in the center.
- Button #2: On the same seal, one is on the left corner.
- Button #3: The last one is on the right corner.
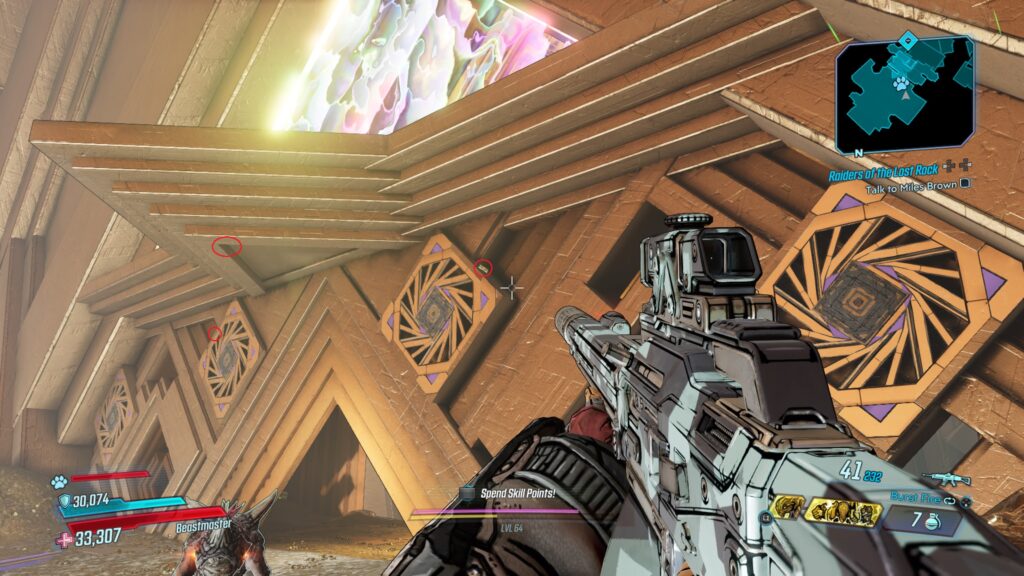
- Button #4: One is in the wedge-shaped awning right above the secret room entrance.
- Button #5: There is a button on the side of the left / right diamond-shaped seals next to the entrance door.
- Button #6: There are two of these — one on the right, and one on the left.

- Button #7: There are three more on the pyramid-shaped forcefield above the entrance. One is in the top corner.
- Button #8: One is in the left corner.
- Button #9: One is in the right corner.
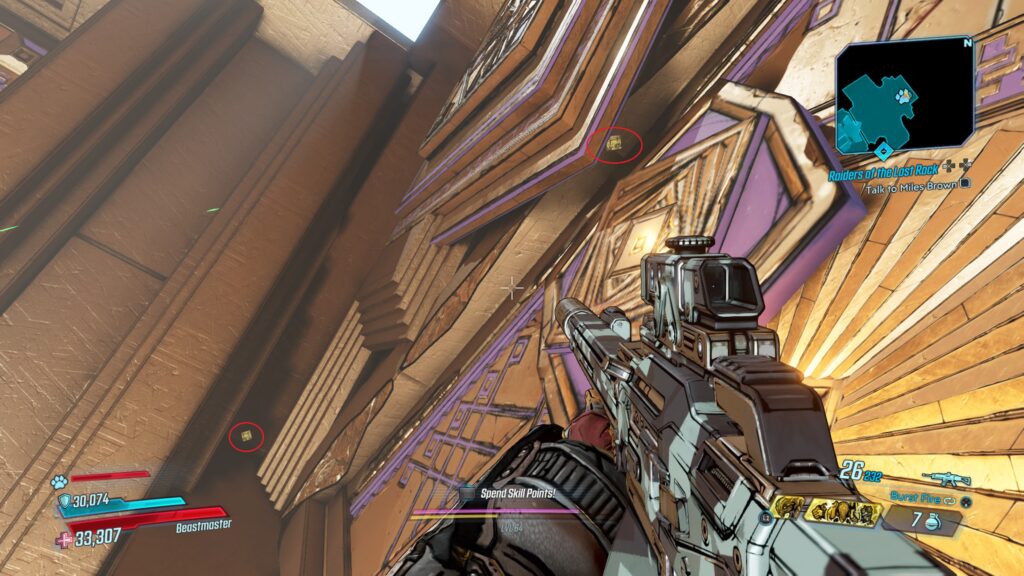
- Button #10: Look at the big purple-accented emblem on the back wall from directly below. One is visible in the center.
- Button #11: One is on the left.
- Button #12: The last is on the right.
Hit all the buttons and the final loot area will unlock. There are two more big bonus chests and three regular chests. You’ll also get the toughest-to-earn achievement in this DLC — the ‘Ye Who Enters’ achievement / trophy.