
Table of Contents
- Prologue & Chapter 1 Collectibles
- Chapter 2 Collectibles
- Chapter 3 Collectibles
- Chapter 4 Collectibles
- Chapter 5 Collectibles
- Chapter 6 Collectibles
- Chapter 7 Collectibles
- Chapter 8 Collectibles
- Chapter 9 Collectibles


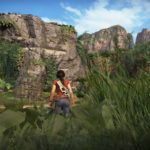


Chapter 4: The Western Ghats
[NOTE: Go to the central tower to find all three temples and the Hoysala Token mystery spot — that will reveal all the Hoysala token locations in this chapter.]
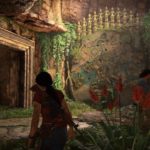
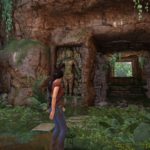
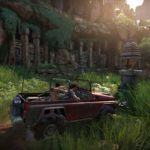
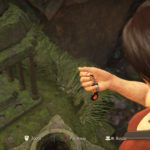
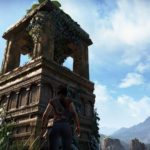
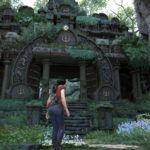
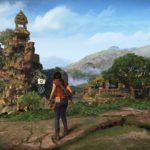
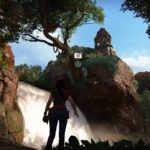
- Photo #6: At the start of the chapter, you’ll have a good view of the tall tower in the distance, right in the center of the map. Go to the ledge to find the photo opportunity.
- Lockbox #2: In the center-southern section of the map (bottom-right Hoysala token location), reachable by a bridge leading south from the central tower, there’s a ruin area guarded by an group of enemies and a turret. The lockbox is to the left of the turret, against the wall.
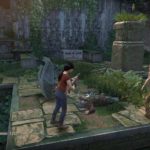
- Photo #7: In the same area, throw a grenade at the weak wall to destroy it, creating a path to a Hoysala Token. Past the token, there’s a statue with a trident pointing to one of the temples. Take a photo of this statue!
- Lockbox #3: Go to the bottom-left Hoysala token location on your map. It requires a whole lot of grappling hook swinging to reach. After three grapples, drop onto the tilework below to grab this lockbox before continuing to the Hoysala token.
- Lockbox #4: Go to the Hoysala token location directly left of the central tower, on the path to the southwestern temple location. There’s a ruin with lots of soldiers — and a lockbox.
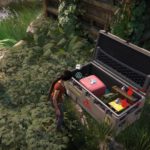
- Treasure #12 (Leather Covered Binoculars): The treasure is inside the lockbox.
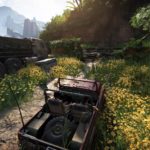
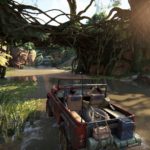
- Lockbox #5: Try the Hoysala token location directly north of the central tower. The lockbox is in one of the trucks parked in the area.
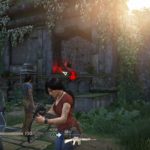
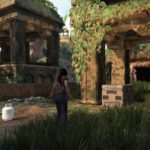
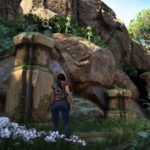
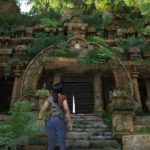
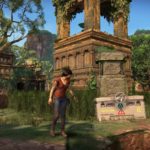
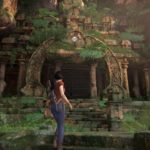
- Photo #8: In the upper-right (northeast) corner of the map, there’s a small enclosed area that can only be accessed through a narrow gate. This is the Hoysala Token map location, and the first spot you should visit. This is also the upper-right Hoysala token location. Defeat the enemies and take a picture in the center of the ruins. This is the area where you’ll get the Queen’s Ruby.
- Optional Conversation #1: You’ll get this conversation after finding all 11 Hoysala Tokens and unlocking the cage containing the Queen’s Ruby upgrade. After the door opens, go through and to the back-left corner to talk about the monkeys.
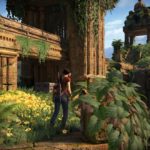
- Treasure #13, #14, #15 (Silver Goblet, Inscribed Copper Plate, Hoysala Kukri): Found inside the small structure through the door that opens when you get the Queen’s Ruby.
- Photo #9: To the right of the observable monkey-pillar, there’s a photo opportunity.
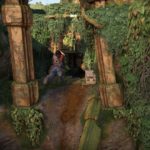
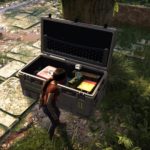
- Lockbox #6: Leave the Queen’s Ruby area through the gate to find a lockbox at the base of the old tower, across the road.
- Treasure #16 (Miniature Bronze Cannon): Found inside the lockbox.
- Treasure #17 (Jade Archer’s Ring): From the previous lockbox, turn left to spy another, taller old tower. Climb to the top to find this treasure.
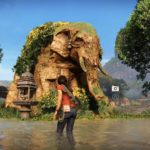
- Treasure #18 (Hoysala Coin): Very tricky. East of the main tower, in the open area between the Hoysala Token locations, there’s a mossy elephant statue near a parked truck. Climb onto the carved-out elephant and reach the eye to get this glowing treasure.
- Lockbox #7: On the eastern side of the map, there’s a Hoysala Token you can collect at the bottom of a well. After getting it, climb back out and a truck with this lockbox will appear on a rocky hill nearby.
- Treasure #19 (Ivory Casket): On the path leading up to the southeastern trident fortress, look right while driving up the narrow passage — the one that’s a very narrow ledge on the first “tier” of waterfalls — there’s a glowing treasure visible on the right, under an overgrown tree’s roots.
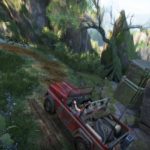
- Treasure #20 (Stag Horn Box): In the southeast corner of the map, continuing toward the trident fort, there’s a path that leads to strong running water you’ll have to drive through. There’s a large rock in the center of the rapids, one “tier” down from the fort entrance. Look for a small pillar on a ridge to the left, before driving down the hill. Look behind the pillar in this area with pink-leafed trees.
- Optional Conversation #2: On the way to the southeastern trident, stop and examine the gatehouse marked with the trident image. Nadine will have something to say after that.
- Lockbox #8: After completing the trident fort, backtrack through the sneaking / fighting section to find more soldiers entering from the stream. Climb out to the large rapids to find two trucks. One of those trucks has a lockbox.
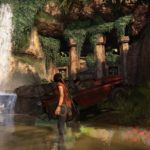
- Treasure #21 (Trinket Box): Leaving the trident fort, you can drive back down the waterfall rapids. Don’t go off the falls — on the left, there’s a dry cave with a treasure inside you can plunder. It’s the only way to safely continue down.
- Treasure #22 (Ancient Stone Jar): Leave the small cave, but turn to face the waterfalls on the right as you do. There’s a small ledge in the center with this glowing treasure. Very easy to miss.
- Photo #10: Leaving the trident fort, you’ll reach an open (muddy) area with a great view of all the waterfalls you just traversed down. Look around the landscape for a good view of the fort and the falls.
- Treasure #23 (Medieval Indian Lock and Key): In the same area you exited the trident fort waterfall from, look for a large ruins structure with reliefs carved into the exterior. There’s a treasure by one of the reliefs on the left. You’ll see it if you face the tower and move to the “wall” opposite the falls.
- Treasure #24 (Rosewood Spice Box): There’s a narrow path east of the central tower. From the basin at the bottom of the trident fort, use the ramp to reach the center of the map — to the left of the rocky ramp, there’s a lower alcove (by a ruin wall) with this treasure.
- Photo #11: At the bottom-left, southwestern Hoysala Token location that’s smack in the middle of the water, there’s a large elephant carved into the rock. Take a snapshot!
- Photo #12: Next, drive toward the center tower to a high rock ridge with a good view of the southwestern bow fort, facing the Hoysala Token elephant statue.
- Lockbox #9: Cross the bridge to the southwestern area (bow fort) — past the bridge, there’s a path with a parked truck. The lockbox is right beside the truck.
- Optional Conversation #3: Examine the gate of the bow fort (southwestern corner) and talk to Nadine afterward.
- Lockbox #10: At the combat area through the bow fort gate, look at the outer tower with a bridge. Drop down to pick the lockbox under the bridge.
- Treasure #25 (Engraved Gourd Jar): Go northwest from the central tower until you find an overgrown bridge over the water. Look under the bridge to find this treasure.
- Treasure #26 (Serpents and Ladders Game): Near the same bridge, driving from the passage northwest of the central tower, there’s some stone steps to the right of the bridge. Climb into the ruins to find this treasure.
- Lockbox #11: At the base of a tower in the large ruins area directly north of the central tower. This is the Hoysala Token location between the axe fort and the central tower.
- Treasure #27 (Nagfani Horn): Tricky to find. Drive north from the ruins area described in the Lockbox #11 entry. On the way north, there’s a thick cluster of trees — find the area marked with a bent stone pillar. The treasure is in this thicket, behind the pillar. The area is east of the waterfall stream, and directly south of the axe fort on the map.
- Photo #13: Go to the waterfall, just south of the Hoysala Token location on the upper edge of the map. From this waterfall, there’s a good view of the northern axe fort — the photo spot is slightly left of the waterfall.
- Treasure #28 (Jade Pendant): At the northern Hoysala Token location, there’s a large ruin with reliefs carved into the walls. Climb up onto the raised interior area on the right. There’s a door leading into a dead end room with this treasure.
- Lockbox #12: On the path to the Axe Fort, you’ll drive against the current until you reach an abandoned truck with a lockbox inside.
- Treasure #29 (Butterfly Trinket): Found inside the previous lockbox.
- Treasure #30 (Metal Tiger Claws): To the right of the park truck, near the waterfall, there’s car-sized tunnel you can drive into. Go through it and look along the left wall to find the treasure inside.
- Optional Conversation #4: At the Axe Fort gate, just like the other forts, Chloe can examine the symbol and have a conversation with Nadine.
- Photo #14: After completing the first puzzle in the axe fort, you’ll find a photo opportunity on the exterior path ahead.
More Uncharted: The Lost Legacy guides on Gameranx:
- Uncharted: The Lost Legacy – Complete Walkthrough
- Uncharted: The Lost Legacy – “Your Prize” Easter Egg Trophy Guide
- Uncharted: The Lost Legacy – All Puzzle Solutions Guide | Act 4, 5, 7
- Uncharted: The Lost Legacy – All 24 Guns | Weapon Select Unlock Guide
- Uncharted: The Lost Legacy – Last Of Us, Marco Polo & More Easter Eggs


