
Table of Contents[Hide][Show]
The scariest quest we’ve found so far in Kingdom Come: Deliverance 2 is ‘The Mouth of Hell‘ — a quest where you’ll be stripped of your gear and forced to sneak through a pitch-black cave while an insane knight stalks you. Unless you’re a master of unarmed combat, there’s no way to beat the knight in a fist fight — the only way to survive is to hide and run. Here’s everything you need to know about this scary side-quest.
How To Solve ‘Mouth of Hell’ | Side-Quest Guide
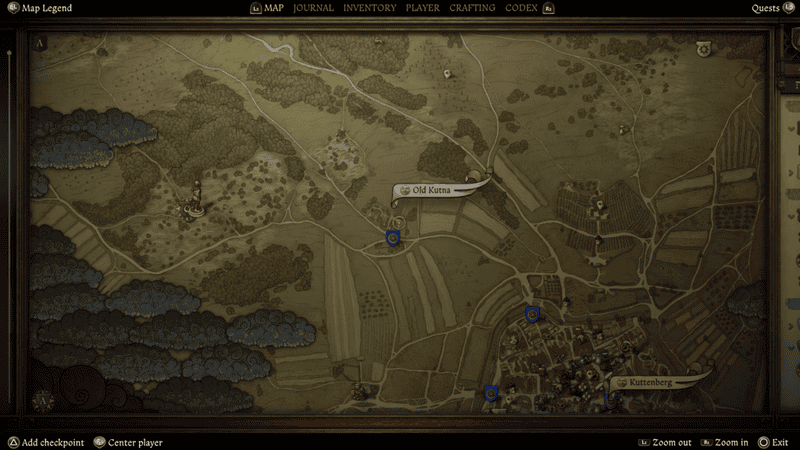
The Mouth of Hell side-quest is found in the village of Old Kutna, located directly northwest of Kuttenberg on the second map. Talk to Father Marian and agree to help to begin the quest. You’ll be given an offering of food for the demon that will be used automatically when you reach the marked area. You’ll be sent to an old mineshaft to the west of town where a demon supposedly resides. There’s a scary sequence here, so you’ll want to be prepared before entering the mine.
- How To Prepare:
- Get a Nighthawk Potion and use it before initiating the cutscene. The scene will start when you enter the mineshaft. You’ll need it. The underground is very dark — it isn’t required, but very helpful.
- Bring a Lockpick and have skills in Thievery or Stealth. To complete the quest peacefully, you’ll need [Medium] lockpicking skill, stealth skill and Robbery skill so you can pickpocket the key if you can’t lockpick.
This is a spooky mission where you’ll be hunted by an opponent you can’t beat — unless you’re extremely good with your fists. If you can’t fight with your fists, this is how to complete the quest.
How To Escape The Hell Mouth
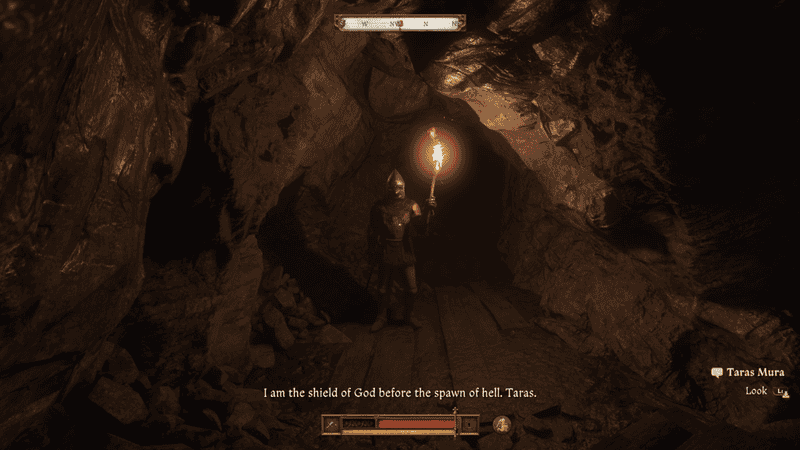
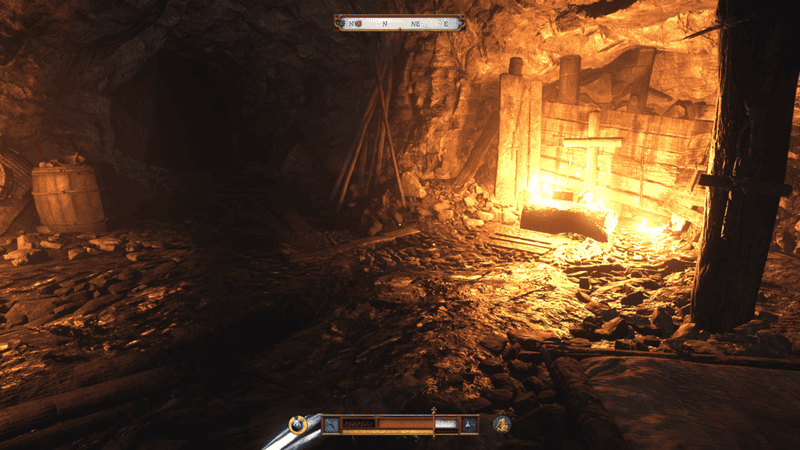
Entering the mineshaft, you’ll drop down and be trapped. The Knight will take all your possessions, leaving you totally naked and without a weapon. The Knight is a killer opponent in full plate armor — without weapons you’ll find it very difficult to fight him.
Sneak in the underground and follow the light and sound in the distance. For now, the knight isn’t actively hunting you. Progress until you reach a small chamber with a bed and an altar with a [Medium] locked chest. You’ll also find a Knight’s Note on the way.
- NOTE: Look for an extra Torch item on the path to the Knight’s Room. There’s an extra next to another already-lit torch. Beware, using the torch will alert the Knight to your location, so only use it when you’re not being hunted.
After the Knight’s Room, progress to the tall shaft ahead with a ladder. The Knight will shout at you from above and threaten you — after climbing the ladder, you’ll encounter the knight in the tunnels above. He’ll attack and kill you if he spots you at this point. You can’t talk to him or convince him. If he spots you, run!
- NOTE: Look for the Work Axe behind the ladder in the starting shaft. It’s on a crate and very difficult to see without Nighthawk Potion or a Torch.
Put the torch away on the upper level and be prepared to sneak. Watch the light of the Knight’s torch and follow him — sneak, even a very low sneak skill will be able to avoid him due to his heavy armor and the deep darkness of the cave. Follow the movement of the red torch light. If it’s moving away from you, follow him.
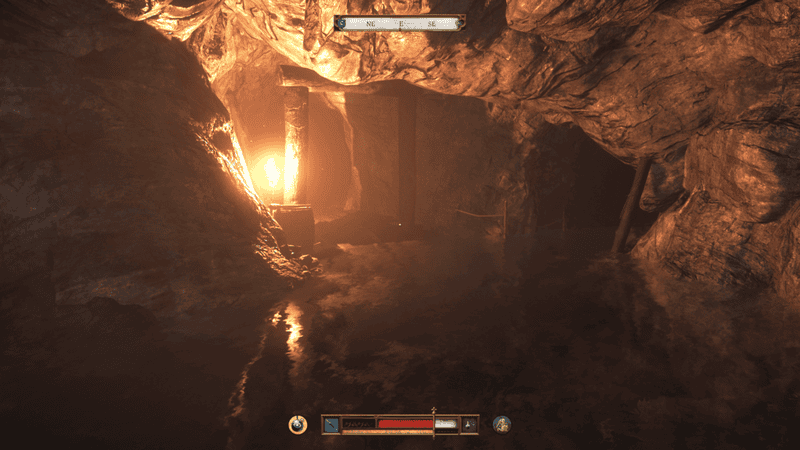
From the top of the ladder, move forward and stay on the left path. Continue to stealth, pass a ladder and reach a lit room with a treasure chest and another Knight’s Note. Open the unlocked chest to recollect all your gear — you’ll automatically fully equip yourself.
- NOTE: At this point, you can now fight and kill the Knight. You can also solve the quest through peaceful means.
How To Get The Best Ending
To end the quest with everyone happy and relieve the knight, you’ll need to return to the Knight’s Room you found early. You can either sneak back or take the path to the right of the chest with your gear — fall down, then follow the caves back to the Knight’s Room.
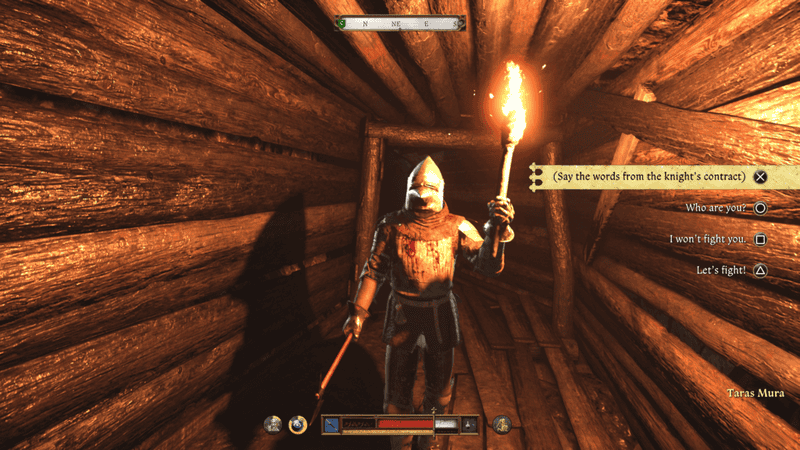
At the Knight’s Room, lockpick the small chest at the altar. This is a [Medium] Difficulty chest. Alternatively, you can pickpocket the key off the Knight while he patrols. This is much more difficult, so I recommend bringing Lockpicks. Once the chest is open, collect the Knight’s Contract quest item.
Next, return to the Knight as he patrols. When he spots you, open the combat dialogue options and select the new dialogue option at the top of the window — this will pause the Knight and you’ll be able to talk to him.
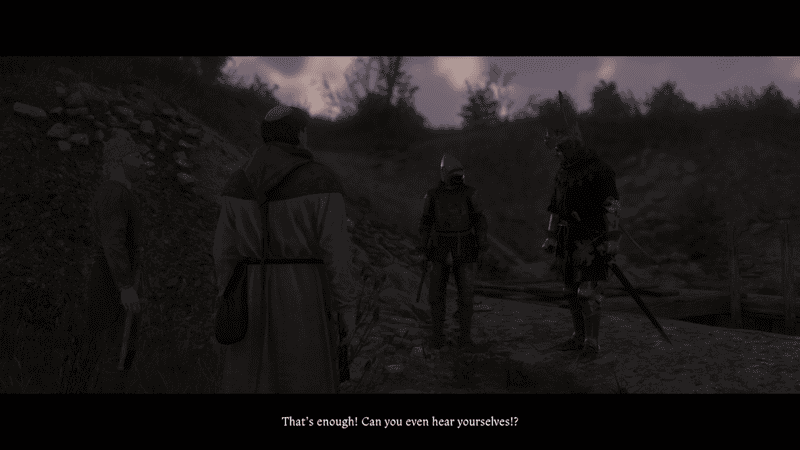
Now that you can talk, convince the Knight that you’re there to relieve him of his duty. You’ll learn that the former priest contracted him to guard the Mouth of Hell — and you’re there to replace him. This will initiate the final cutscene — don’t miss the dialogue countdown to stop the tension and offer to help everyone. For helping the knight and saving the town, you’ll earn x475 Groschen.
If you fail to calm the villagers, you can get into a fight — you can side with the villagers or the Knight. If you pass the Speech check, you’ll calm both sides and peacefully end the side-quest.


