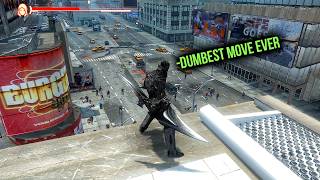

The French Revolution is even more chaotic in Steelrising, a new Souls-like that drops you into a Paris ravaged by haywire automatons. With a wide variety of weapons, you’ll fight your way through ravaged streets and work with historical figureheads like the Marquis de Lafayette. The combat and exploration are what’s important here, with blazing-fast encounters against twisted machines — butchers, dancers, and massive royal knights stalk the barricaded streets in search for blood. You’ll have to survive and thrive to end the nightmare.
And you can do a few good deeds along the way. There are side-quests to complete, and one side-activity involves discovering the hidden pasts of NPCs. By finding all three of their echoes — collectibles that unlock a cutscene revealing the past — you’ll be able to save them. Check out all the echo locations in in the full Steelrising guide below.
All Echo Locations | Collectible Locations Guide
Echoes are special collectibles that show you cutscenes that further explain the backstory of certain NPCs. There are x3 for each NPC — with one special exception — and each set of echoes are related to a specific region. At the end of each region, you’ll encounter an NPC. Finding all 3 of their echoes allows you to save them.
Athenais de Vaucanson
- Echo #1: Les Invalides – Revisiting Lafayette after the factory, talk to him and then go down the stairs and look on the table.
- Echo #2: The Bastille – Much later in the game, after defeating the main boss of The Bastille, you’ll reach a Vestal in the room past the boss arena. Enter the torture chamber ahead to get this echo.
- Echo #3: Versailles – Even later in the game, you’ll encounter the Queen in Versailles. In the garden below, reach an open gate near a small stone bridge. Enter the gate and find the echo to the back-right in the shaded area.
The Bishop of Nancy
- Echo #1: La Cite – Unmissable. Near the bridge you’ll cross a burning barricade. Jumping across and near the First Vestal, you’ll automatically encounter this echo.
- Echo #2: La Cite – Unmissable. Defeat the Unstable Butcher and continue down the main path to encounter this.
- Echo #3: La Cite – Unmissable. The final echo is unlocked before the main boss fight.
Jean Sylvain Bailey
- Echo #1: The Tuileries – Jumping up to the upper floor room that leads to the gardens, there is an echo in the corner. This path is required so you almost can’t miss it.
- Echo #2: The Tuileries – Near the end of the gardens, there’s a wooden tower you can zip up onto. To the right, look around the flowers for this echo.
- Echo #3: The Tuileries – Past the observatory, go down the stairs to progress and to the end of the hallway, past the window you can exit out of.
Athenais de Vancanson
- Echo #1: The Tuileries – Return to the gardens entrance after acquiring the special wall-breaking ability from the boss in Luxembourg. Near the entrance to the gardens, zip up onto a scaffolding to the Louvre Apartments and jump across to find a cracked wall. This leads to the Rue Saint-Honore area — drop into the sewers, smash through another wall, zip back up and you’ll find the echo near some steps on the street.
- Echo #2: The Tuileries – Complete “Nicolas Flamel’s Final Journey” side-quest to unlock his workshop. Go inside to find this echo.
- Echo #3: Luxembourg – Complete the “Origins” side-quest. Automatically appears after finishing the quest.
- Echo #4: Les Invalides – At your second revisit, you’ll need to begin the “Origins” side-quest to open the large golden gate on the path to the hotel. Enter Vaucanson’s house to unlock the echo.
Antoine Lavoisier
- Echo #1: The Tuileries – Inside the Louvre, you’ll get this automatically as you pass through the apartments. Appears once you enter the observatory.
- Echo #2: Luxembourg – Passing through the gardens, you’ll spot this echo inside a stone gazebo.
- Echo #3: Luxembourg – At the end of the garden, there’s a bent fence where you can jump across to the open window across. Instead of jumping to the window, drop down to the street and run to the right. The echo is past the wrecked carriage.
Jacques Necker
- Echo #1: Les Invalides (Revisit) – From Necker’s Townhouse, exit through the bent gate (with the red crates) to reach Fauborg Saint-Germain. On the street, check by the barricade straight ahead.
- Echo #2: Les Invalides (Revisit) – Defeat the Unstable Frost Acolyte boss, then check the front of the church to collect this echo.
- Echo #3: Les Invalides (Revisit) – On the main path, enter the hotel courtyard and immediately turn left before going to the objective.
Choderlos de Laclos
- Echo #1: Montmartre – Reach the second Vestal in the underground area. From the Vestal, travel right and smash through the cave wall. The echo is in this chamber ahead.
- Echo #2: Montmartre – Smash through the cracked wall near the giant elevator to reach the Refuge area. You’ll need to reach this area to repair the elevator.
- Echo #3: Montmartre – Take the large elevator down (after repairs) and follow the cavern. Pass the water, then turn right at the room bathing in blue light. Continue forward, then turn left at the next bend — there’s a rock ramp leading to this echo.
Sanson
- Echo #1: The Bastille – Under the bridge leading to the Bastille main gate. Drop down into the moat to collect it.
- Echo #2: The Bastille – Entering the Jailer’s Quarters, go through the left door near the next spiral staircase. The echo is at the end of the hall.
- Echo #3: The Bastille – From the ramparts, you’ll go downstairs to reach the L’arsenel and Workshops. Continue down to the Jailer’s Quarters and go through the first door on your right. Smash through the cracked wall at the end of the hall to find this echo.
Madame de Polignac
- Echo #1: Versailles – At the first Vestal in the area, go through the gate built into the hedge in the back-left.
- Echo #2: Versailles – Leaving the hedge maze and reaching the Petit Trianon area. Check near the fountain to the left as you enter.
- Echo #3: Versailles – After speaking to the queen, progress until you need to find a new lever. Eventually, you’ll find a replacement on a dead body. The last echo is located by the gate to the right of the body.
And that’s all 28 echoes. Enjoy the backstory — and doing a good deed.