There are two types of bosses in Sekiro: Shadows Die Twice. There are major bosses, and mini-bosses. Mini-bosses are often completely optional. Both boss types are special, named enemies that are much harder challenges than standard enemies. Defeating them will drop useful items like Prayer Beads or Memories which will increase your health or attack damage respectively.
Bosses are the main enemies you’ll have to defeat to progress in the game. Some bosses will lock you into an arena, while others allow you to retreat at any given time. All bosses have two ‘Deathblow’ health bars. You’ll need to hit them with two Deathblows to defeat them. This is standard, but some bosses can be defeated with a single deathblow — or can’t be defeated with a deathblow at all.
- NOTE ON DEATHBLOWS: Many bosses can be attacked from stealth, allowing you to initiate a stealth Deathblow and cut down their health by 50%. You can only do this once. If you retreat and attempt to hide, the boss will fully recover. Initiate the battle after your stealth deathblow and finish the boss in combat.
Table Of Contents
- Ashina Outskirts Bosses
- Hirata Estate Bosses
- Ashina Castle Bosses
- Senpou Temple, Mt. Kongo Bosses
- Sunken Valley Bosses
- Ashina Depths Bosses
- Fountainhead Palace Bosses
- The Final Bosses
Mini-Boss: Shinobi Hunter – Enshin of Misen
- Optional?: Yes
- Stealthblow?: Yes
- Location: Hirata Estate, before Bamboo Thicket Slope Idol
- Loot: Prayer Bead
A simple mini-boss you can avoid or confront as you explore the estate. Clear the enemies around him, then use a stealth deathblow to knock his health low. Parry and use Mikiri Counters to quickly defeat him.
Mini-Boss: Juzou the Drunkard
- Optional?: No
- Stealthblow?: Yes
- Location: Hirata Estate – Main Hall
- Loot: Prayer Bead
This challenging, heavy opponent is surrounded by enemy soldiers. It might look like you can’t stealth attack him, but you’re wrong — clear out the enemy soldiers, then hide and wait for him to lose track of you. That’s your chance to give him an easy deathblow, making the fight significantly easier.
The boss is a heavy opponent that sprays poisonous breath after drinking from his bottle. You can cure poison with Antidote Powder. The massive man is susceptible to Robert’s Firecrackers, and takes damage from Shurikens at long range.
NOTE: To make life easier, lure him toward the water — a samurai of the Hirata Estate will aid you in combat.
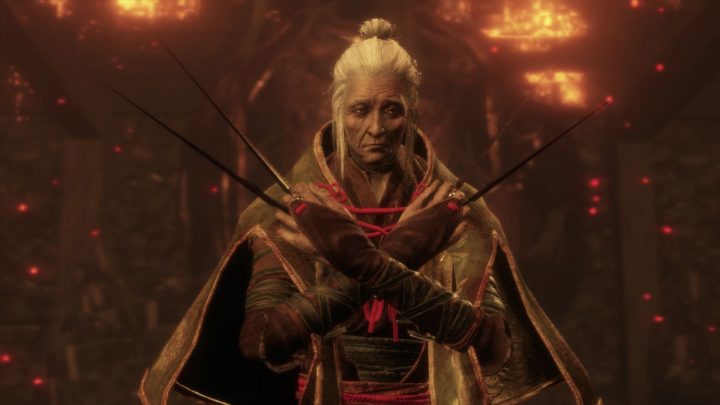
Boss: Lady Butterfly
- Optional?: Yes
- Stealthblow?: No
- Location: Hirata Estate – Main Hall
- Loot: Memory: Lady Butterfly, Sakura Droplet
The boss is located in the underground, past the secret mat at the end of the Estate area. Use the key given by The Owl to unlock the door and access this boss battle.
Lady Butterfly is a nimble opponent that constantly attacks from long-range before switching to close-range. To defeat her, you’ll need to learn how to counter her attacks and combos. Dodge her thrown kunai, and parry her attacks.
Lady Butterfly only has two unblockable attacks — while hanging from a string, she’ll always attempt to grab you. On the ground, she’ll only attempt to sweep you. Jump to damage her posture, and continue to parry her to bring her down. If you can successfully learn to parry, she’ll go down without too much trouble.
Phase 2: In Phase 2, she’ll gain the ability to summon ghostly spirits that will attack Wolf. You can avoid these minions by running around until the minions transform into projectiles, or use a Snap Seed. Otherwise, she fights almost exactly the same as before.
Use the Shuriken Prosthetic to harass Lady Butterfly from afar. Any damage you can do will make her posture meter recharge slower.